A campaign involves sending a single email to your recipients, either immediately or by scheduling it to send later.
There are two types of email campaigns you can create and send with our application — a regular campaign, or an A/B test campaign. Both types can be sent as HTML or plain text, which are the only two formats we support. It's not possible to send in other formats, such as PDF or Microsoft Publisher.
Besides what we refer to as "regular campaigns", you can also send journey emails.
Create and send campaigns
To create a regular campaign:
- Click Campaigns.
- Click Create a campaign.
- On the next page, choose a name to identify your campaign and click Continue.
The campaign checklist
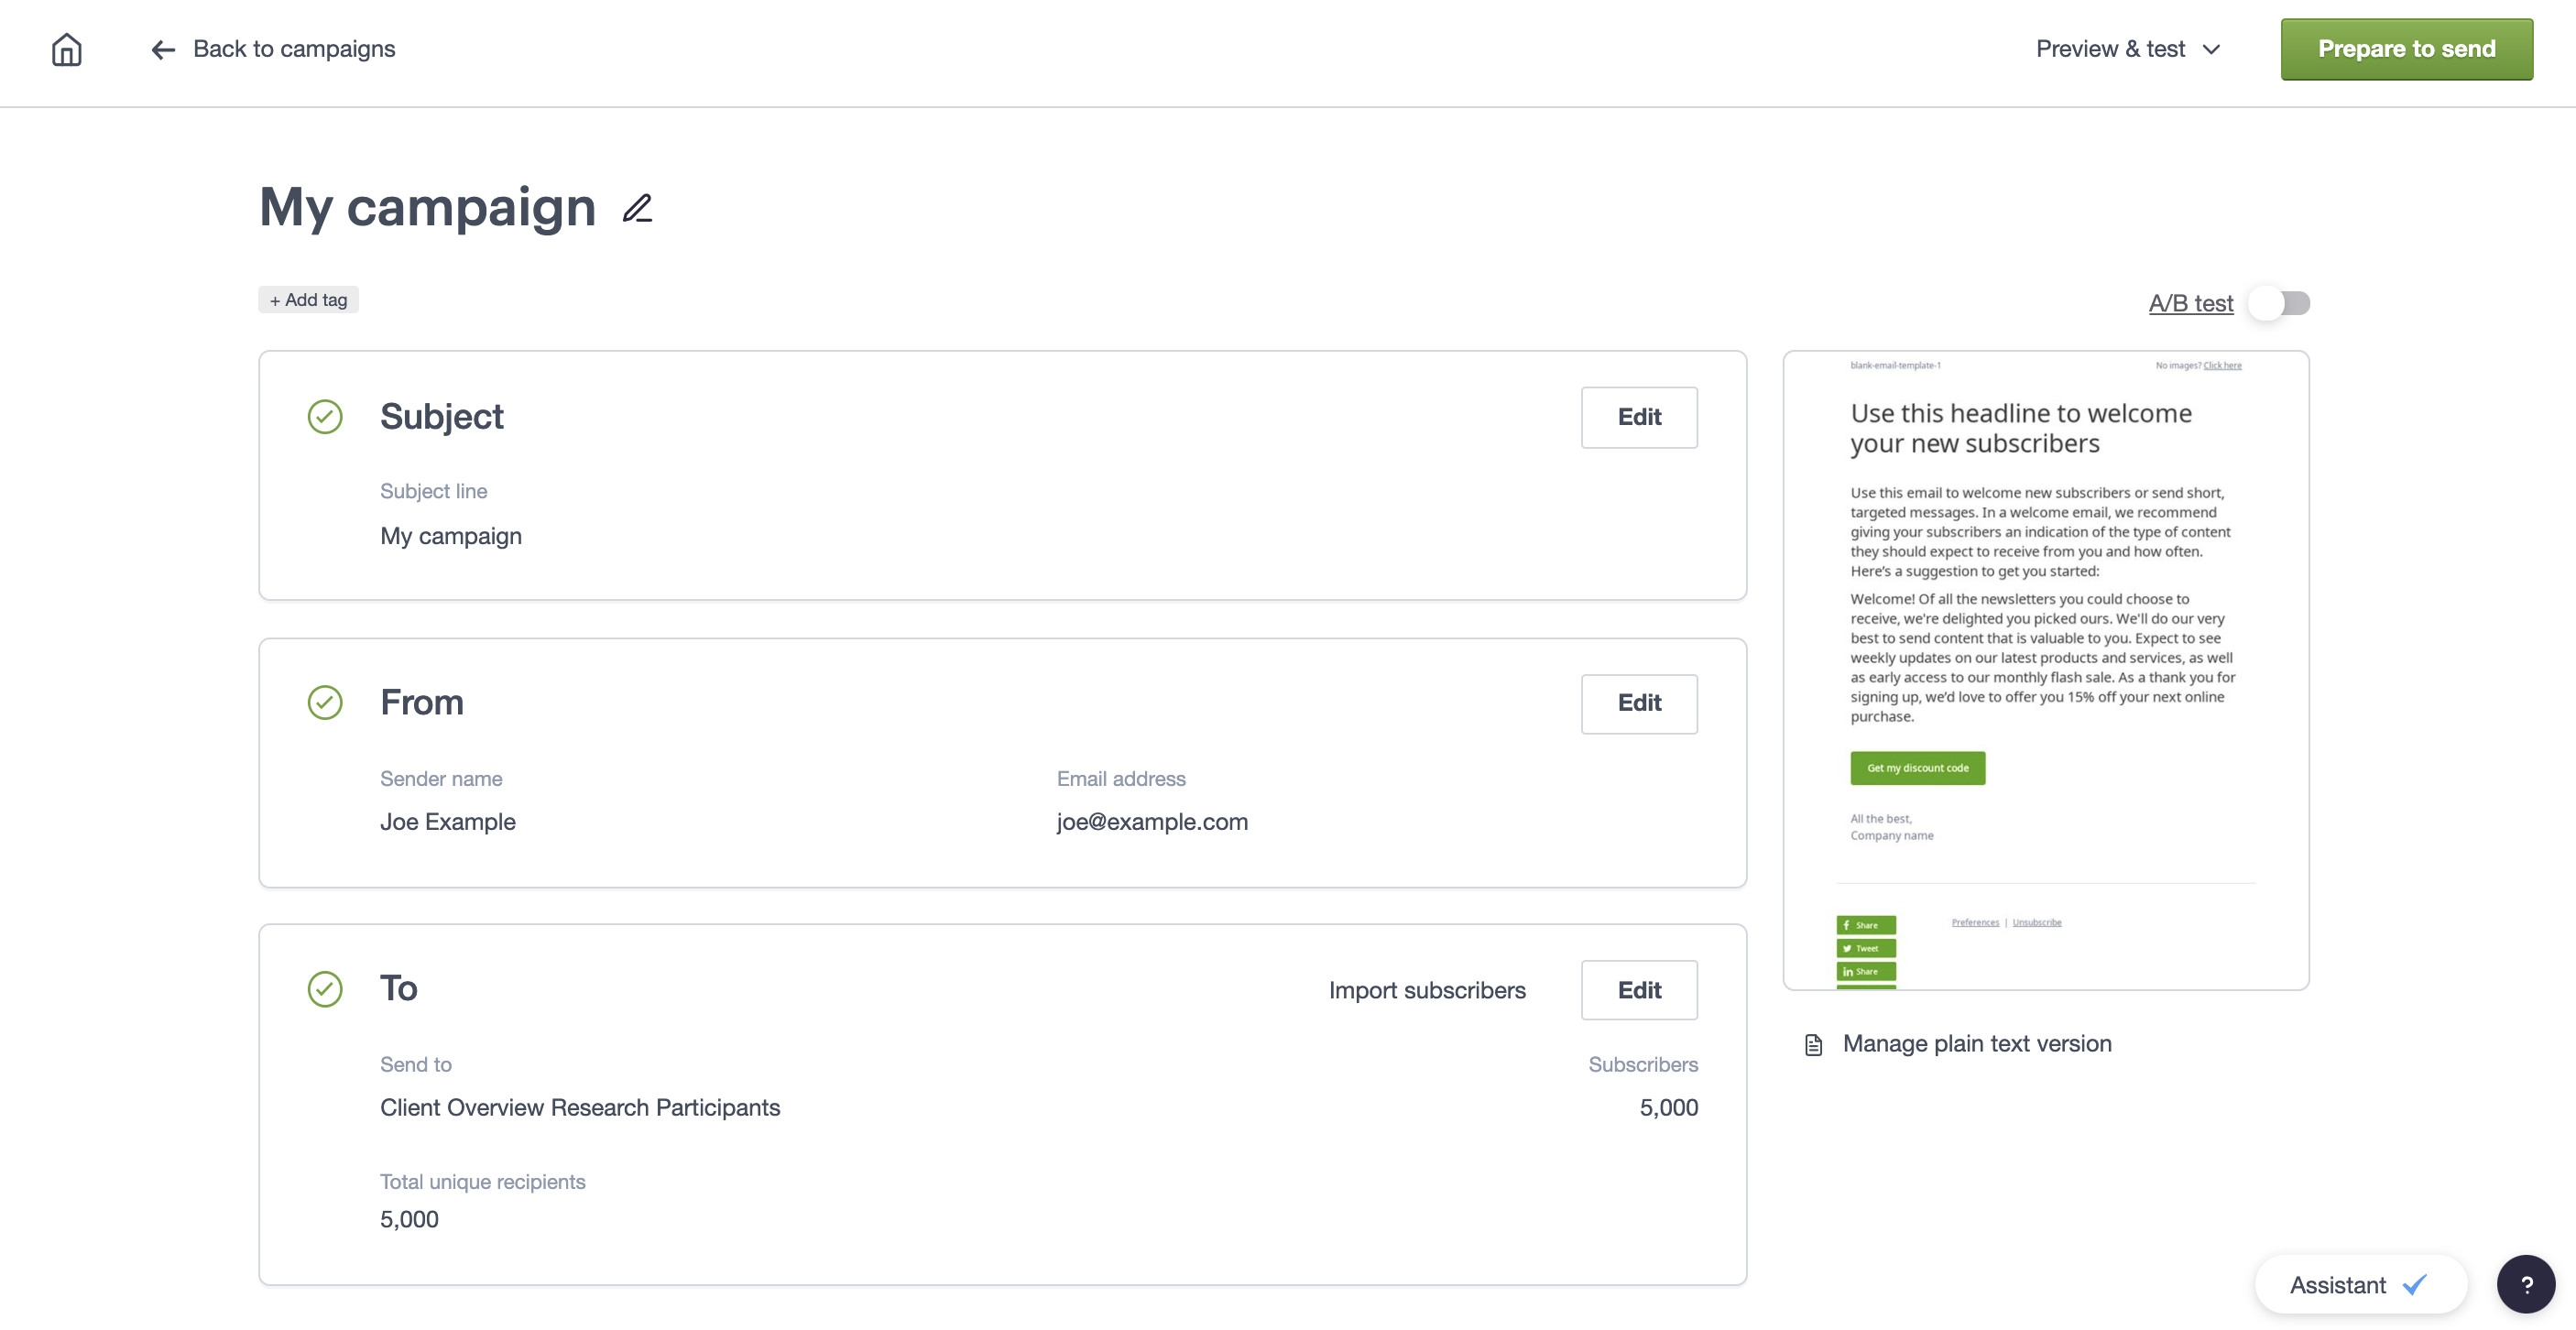
You can edit, preview, test and send your campaign from the campaign checklist, in the order that works for you.
You can also convert your campaign to an A/B test or add tags to organise your campaigns.
Choose an email subject
Click Add subject to create your subject line and preview text. Click View latest for a summary of your recent subject lines and their open rates.
Personalization tags can be added to both the subject line and preview text. We also provide smart recommendations to help you craft an effective subject line.
Click Save when you're done.
Save sender details
Click Add sender and choose a "From" name and email.
You can use personalization in either field and set a different reply-to address if you need to. If you or a teammate has sent a campaign before, some information may already be saved. You can click Edit to update it.
Choose your recipients
Click Select recipients to choose from your existing subscriber lists.
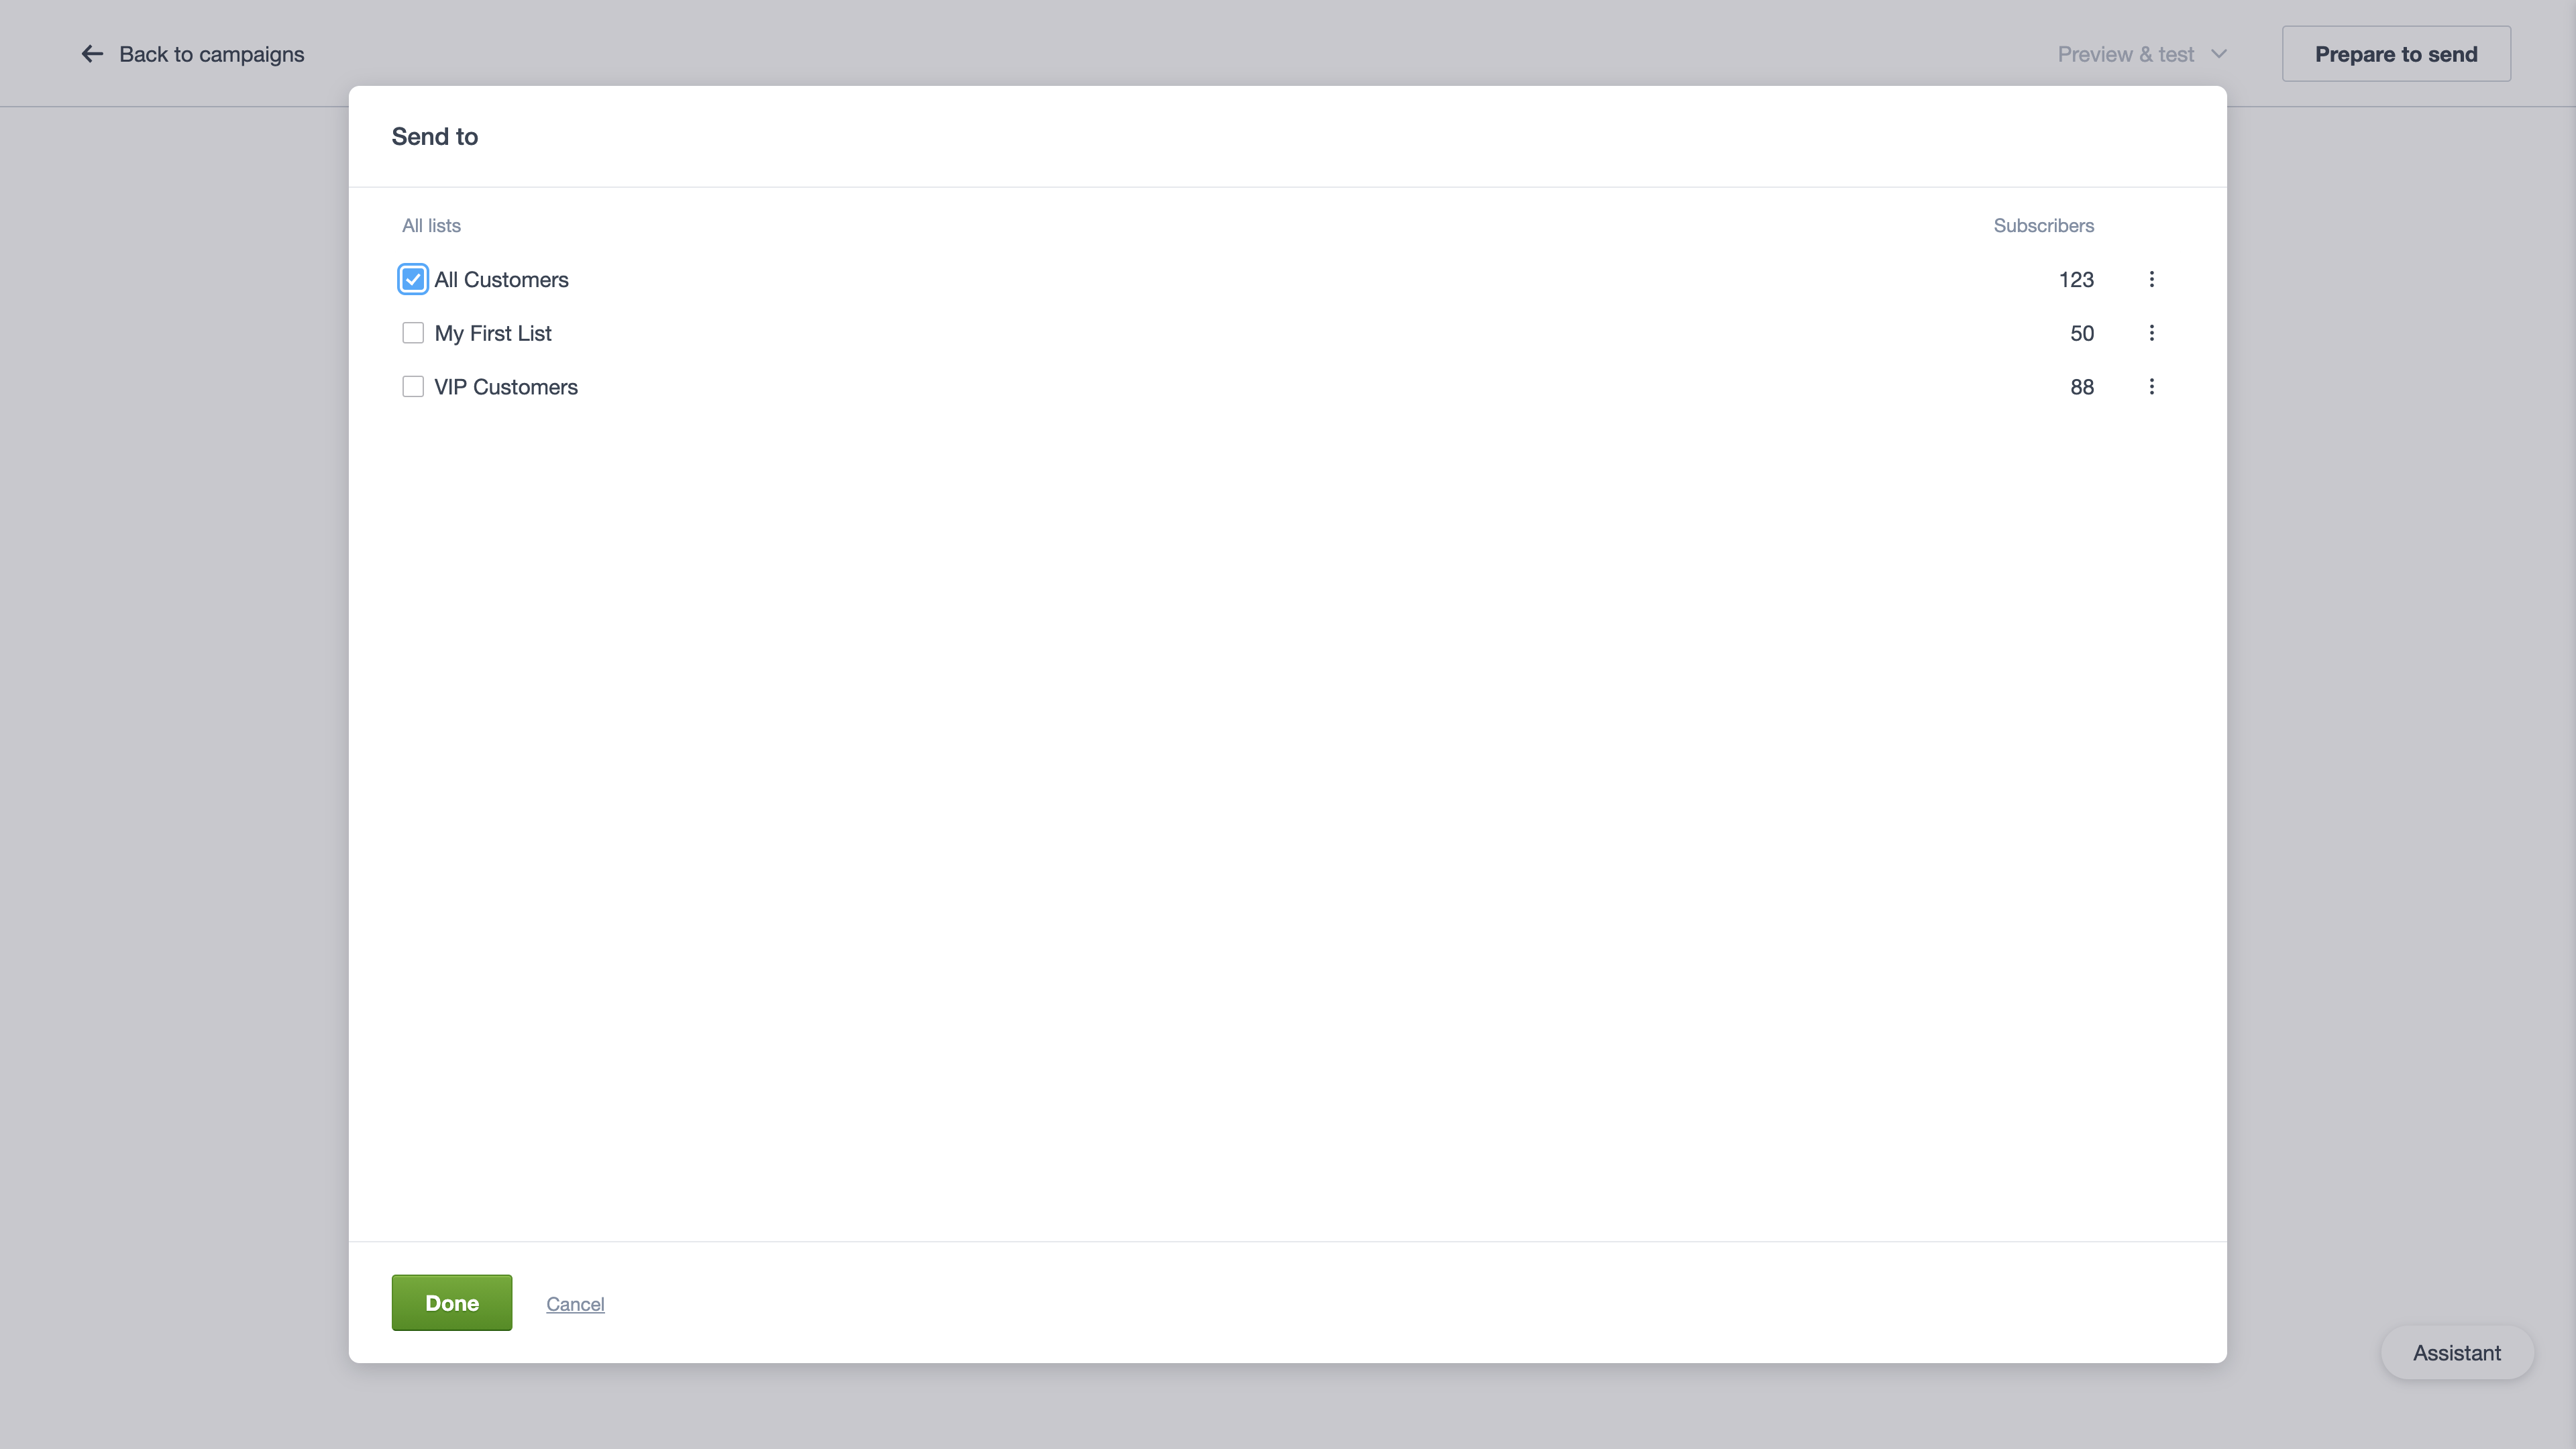
If your chosen list has segments, they will appear under the list name. Premier plan customers can also see engagement segments here.
If you have more than 20 lists, you can search for a list or segment, or select from those suggested. You can also exclude subscribers in a list or segment by clicking Exclude.

If you need to add a new list for this campaign, select Import subscribers. Create your list and add your subscribers. You can always change the list name and type later.
Check your selections, then click Save. You'll see a summary of recipient numbers.
At this point, if you have imported a number of subscribers, you may see a system message prompting you to start the approval process. This is an important part of maintaining our deliverability ratings. If you don't see the message it means you don't need approval to send to the number of subscribers you've selected.
Design your email
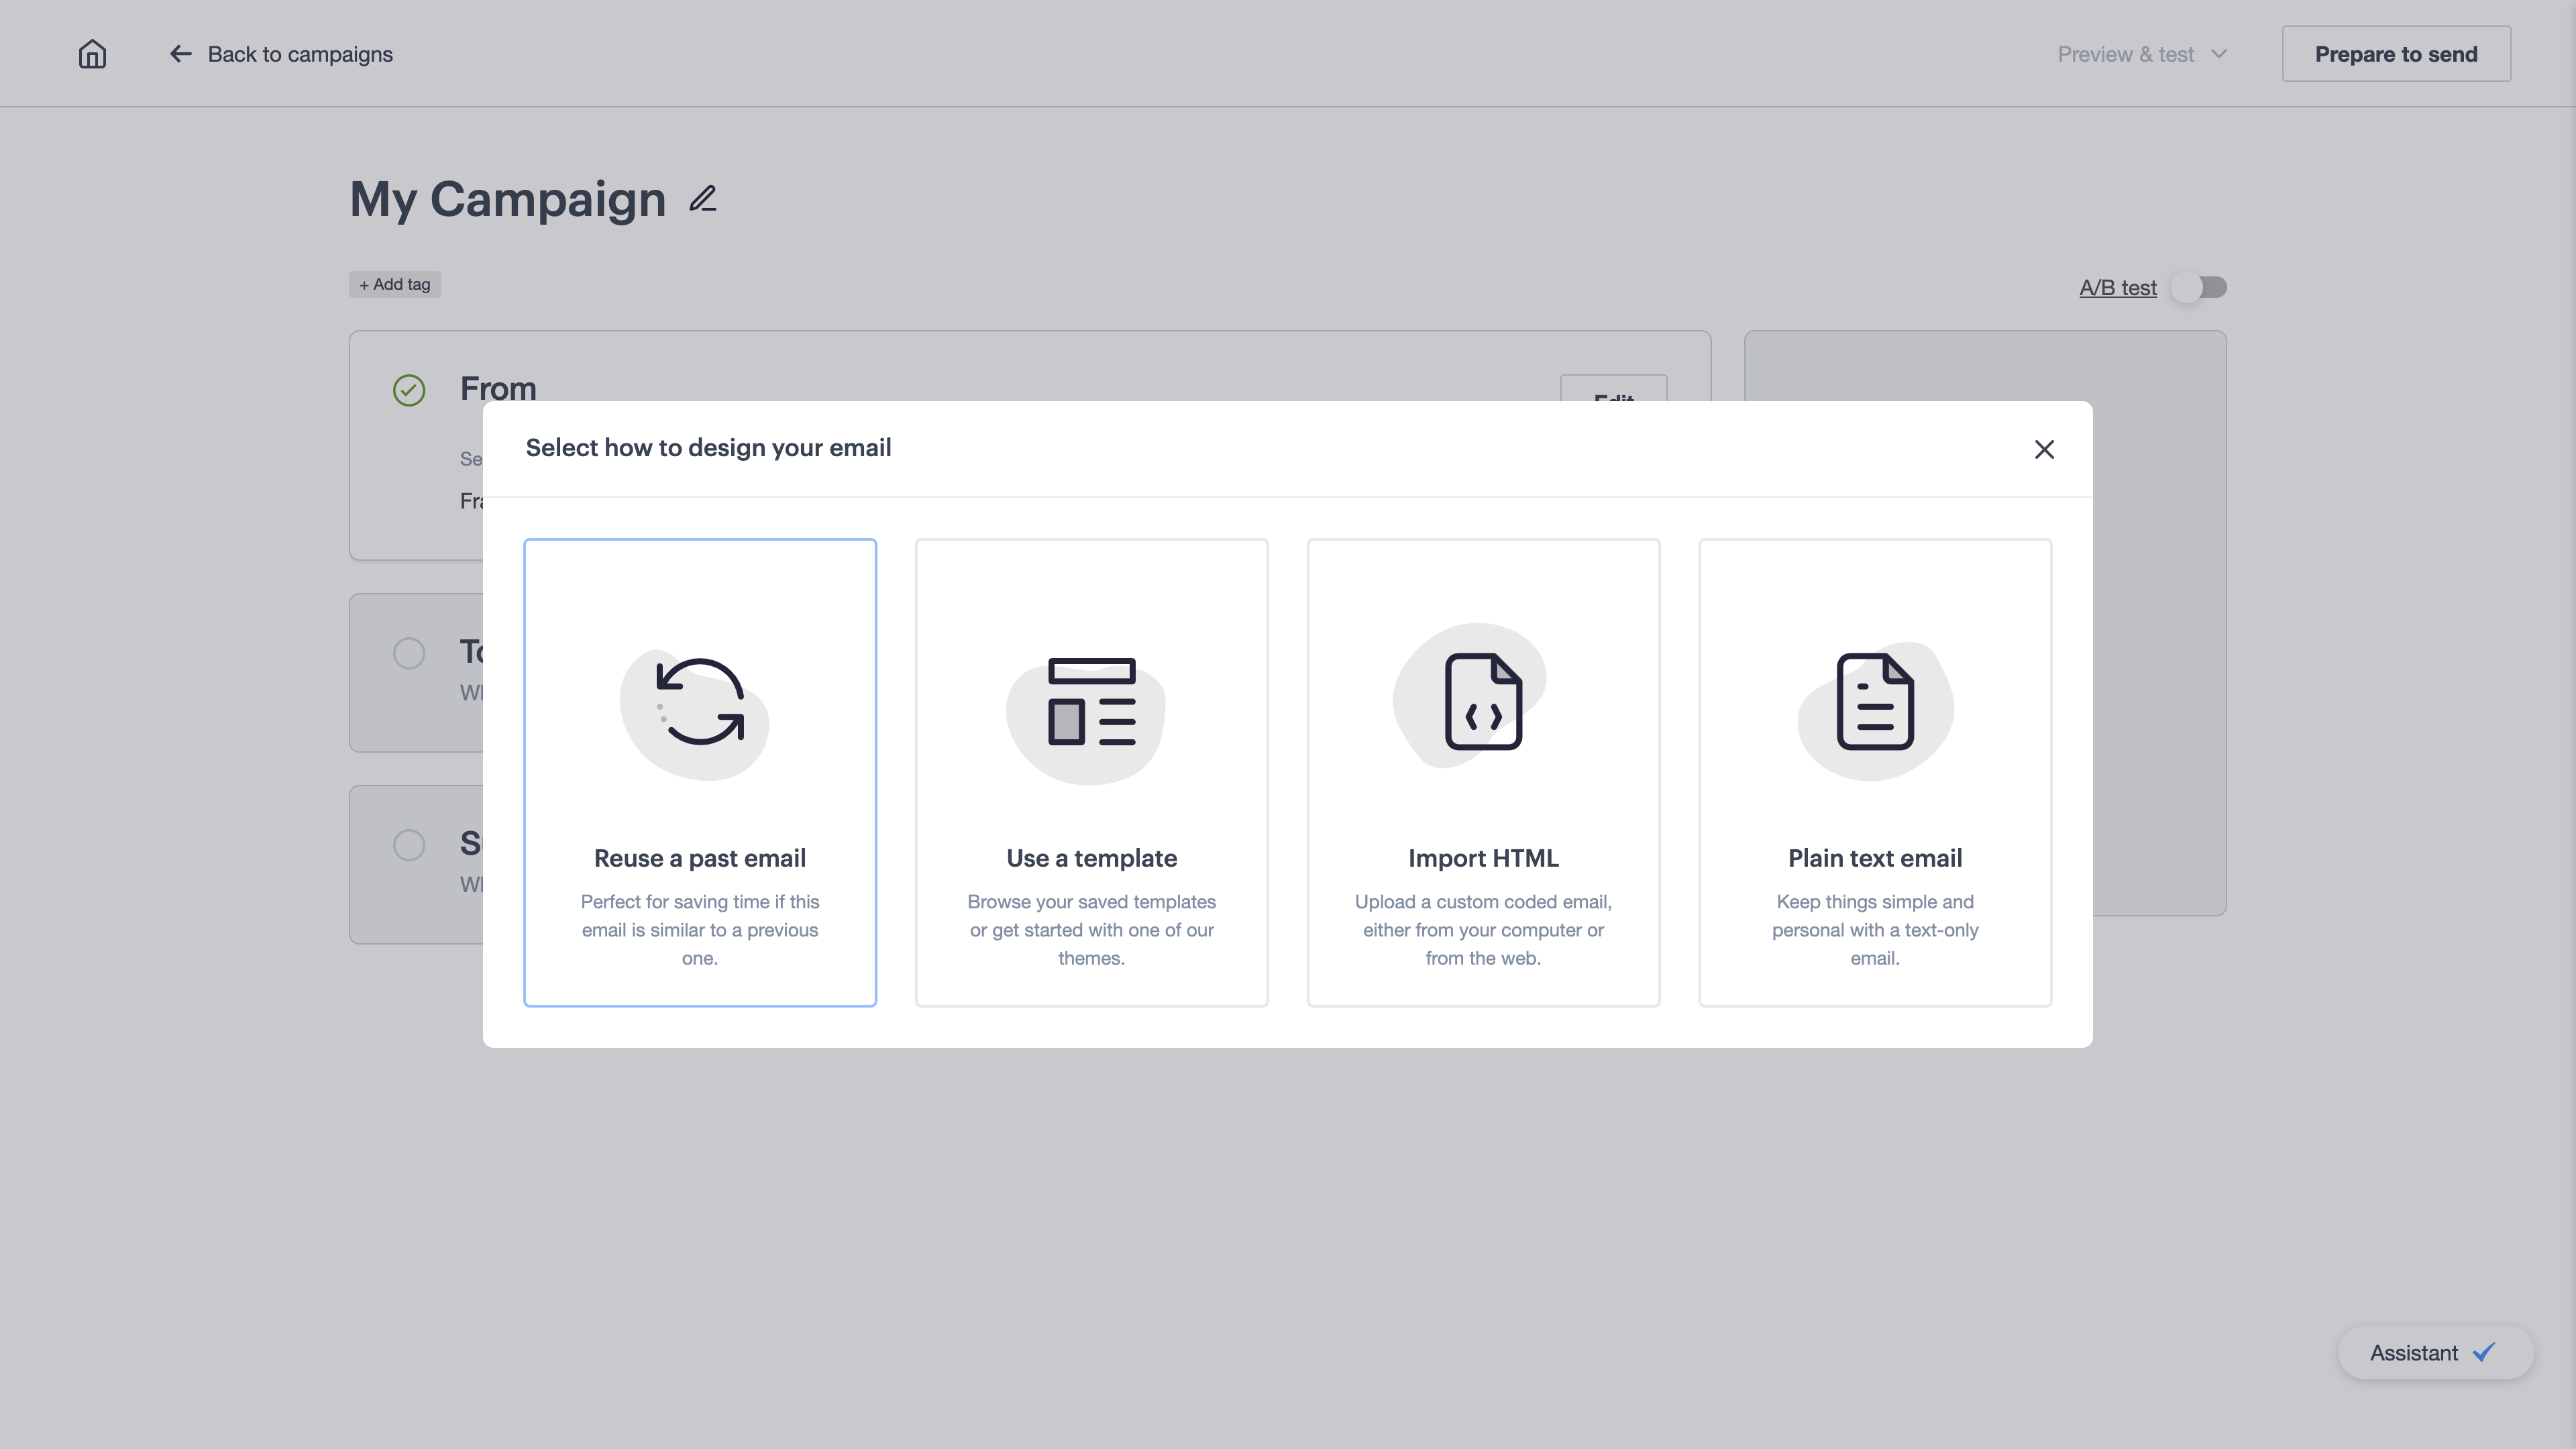
There are a few different ways you can design your email campaign:
- Reuse a past email — If you have created or sent a previous campaign, you can use it as a starting point.
- Use a template — Select one of our email builder themes and customise it to suit your brand. When you're done, you can save the email as a template to use again next time.
- Use a custom HTML template — You can import a custom coded template to use, however, this has to be done before you create a campaign. When it's uploaded you can select it by clicking Use a template. Learn more about our email template options.
- Import HTML — If you already have a complete HTML email, designed externally and ready to send, you can import it from your computer or the web by selecting Import HTML. You can preview the design and make quick inline edits to refine it.
- Plain text — Text-only emails are another option. Select Plain text email to create one. Please note that only basic reporting is available for plain text emails.
When your campaign content is ready, click Save & next to return to the campaign checklist. It's a good idea to check the plain text version of your email because what looks great as HTML might need adjusting for text only.
Preview and test your campaign
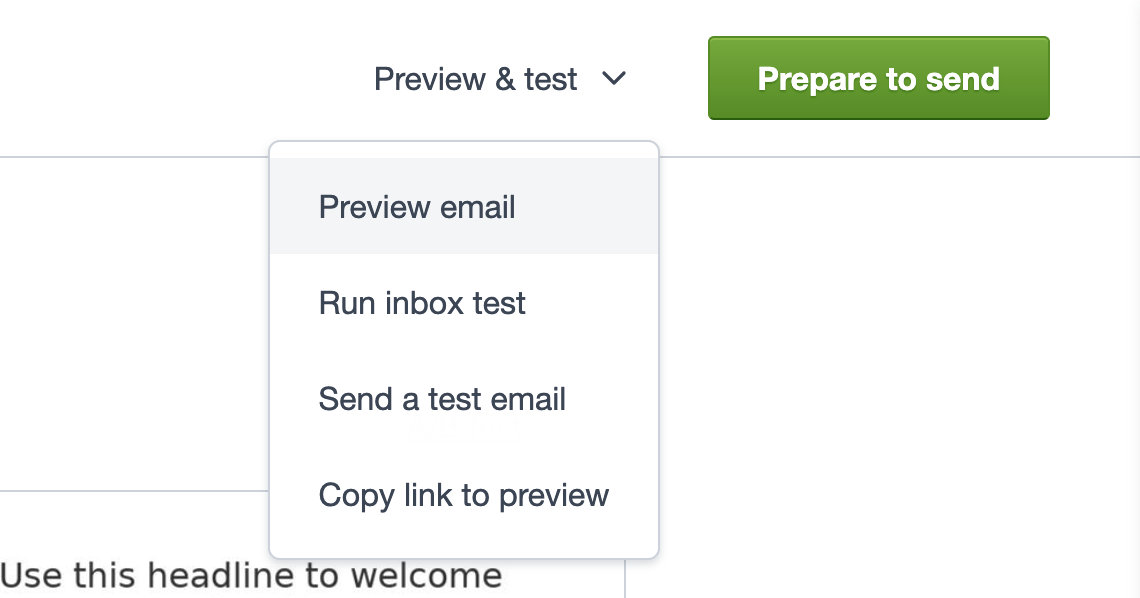
A crucial part of any email campaign is testing. We offer a variety of tests so you can send the campaign to yourself or colleagues for proofreading, and make sure everything looks as expected, even if you use personalization and dynamic content. More about our email test options.
The Assistant
The campaign Assistant offers helpful suggestions and surfaces issues that would prevent you from sending your campaign. This feature is still in development, and we're working on making the campaign creation process more intelligent for you.
Once your testing is complete, you are ready to Prepare to send.
Prepare to send
You can choose to either send the campaign immediately or schedule it to send later (including advanced sending optimisations).
If you're sending to five people or less, click Immediately or Schedule for later to start the sending process. Click Continue to add an email address (or several) so we can notify you once sending is complete. Then click Send now, or Confirm schedule.
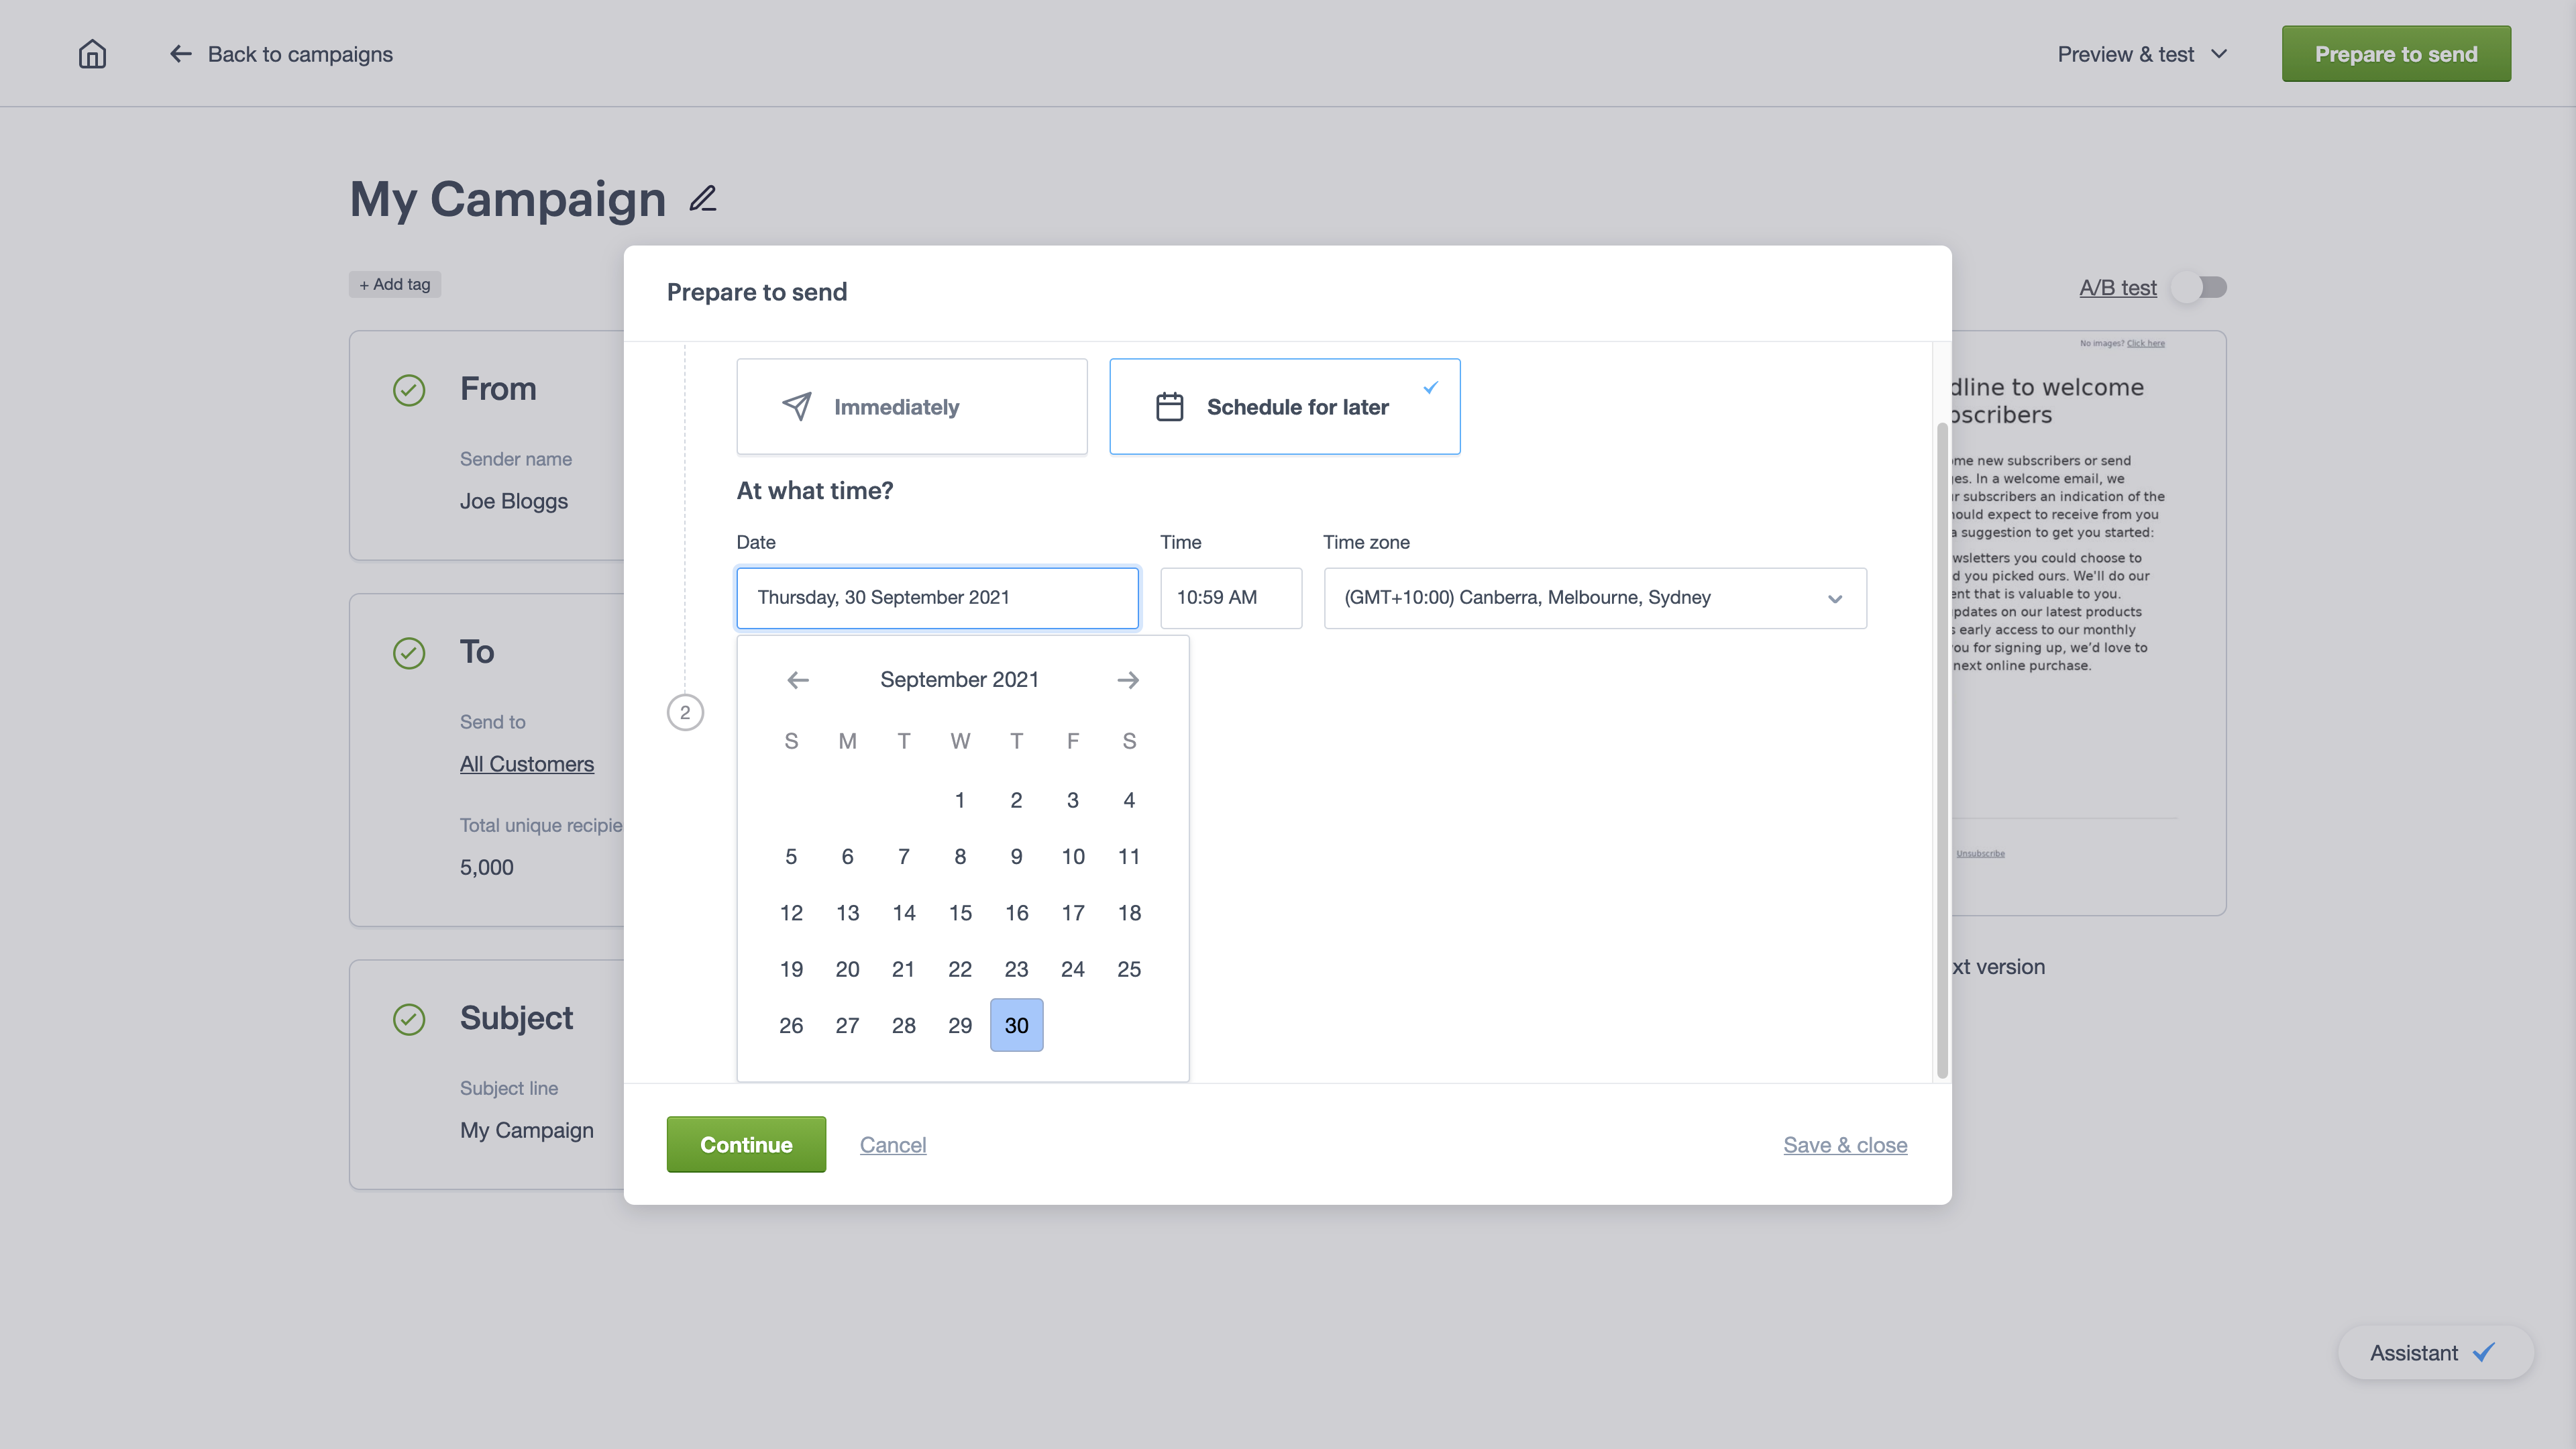
For sending to more than five people, depending on your payment plan you may see Continue to payment instead. Follow the on-screen instructions to add your payment details to be able to send the campaign.
Copy campaigns
Copying a draft or sent campaign is handy if you need to send the same campaign to different groups of subscribers, or if you only want to make small tweaks for your new campaign.
You can also create new campaigns from past emails.
To make a copy of an email campaign:
- Click Campaigns, and then choose either Drafts or Sent campaigns from the left menu.
- Click the three-dot icon for the campaign you want to copy, then choose Copy from the menu that appears.
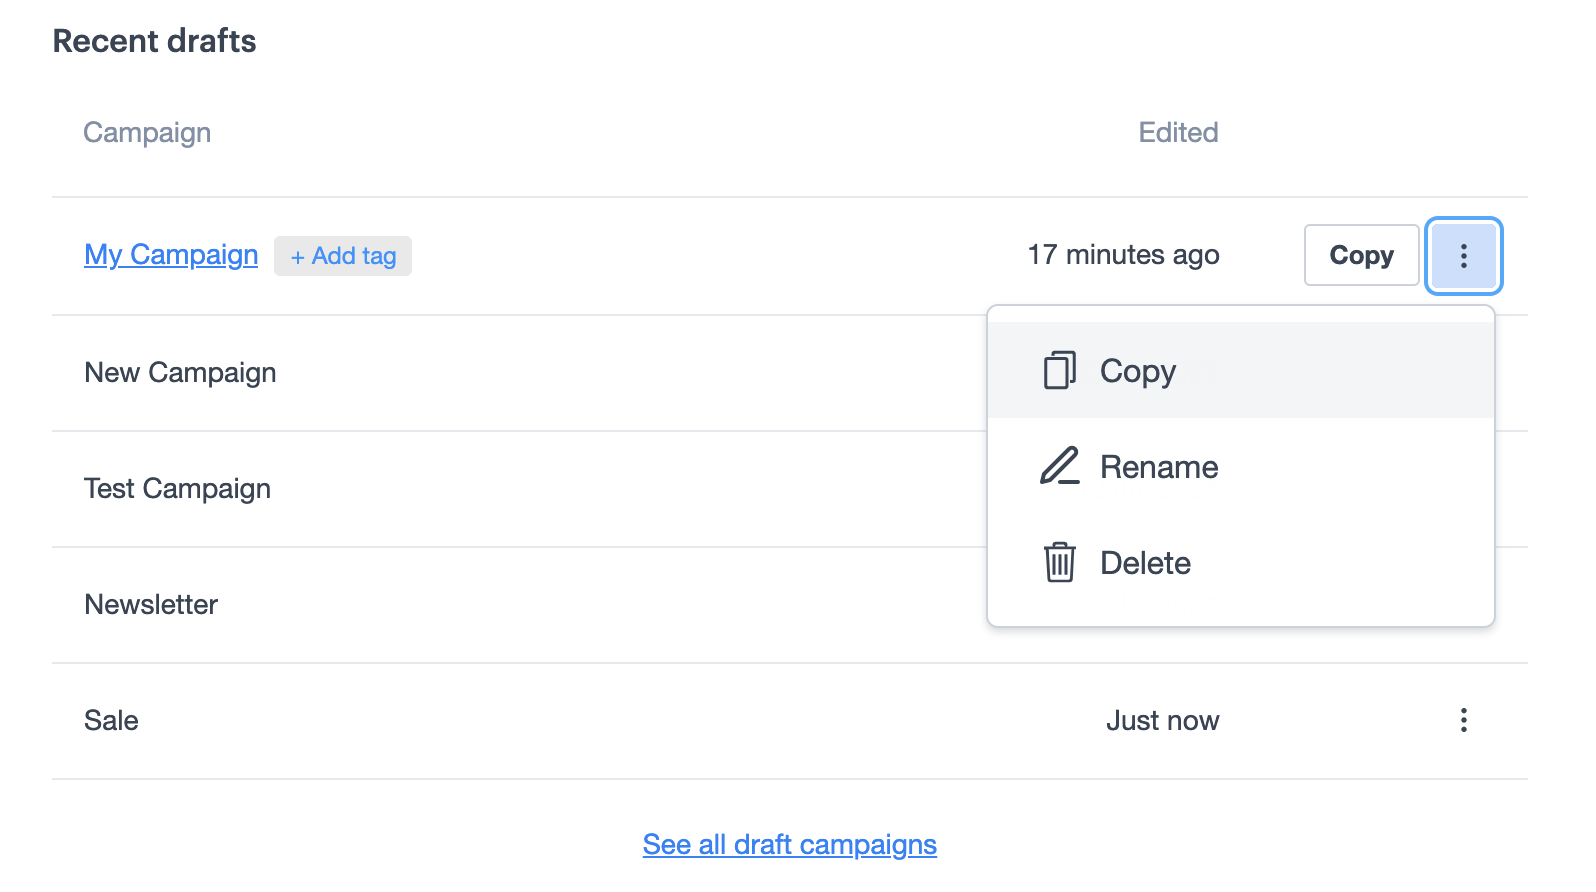
The copy of the campaign will be added to your list of drafts with (copy) added to the end of the campaign name. If you make more copies they will be called copy 2, copy 3, and so on.
After you have created a copy, click on the campaign name or thumbnail to open the campaign checklist. If you need, click the Edit buttons or links to the right of each section to change the campaign name, sender details, subject, the campaign design, or recipients for the new version of the campaign.
To make changes to the plain text version of your campaign content, click Manage plain text version under the design thumbnail.
Delete campaigns
To delete a campaign:
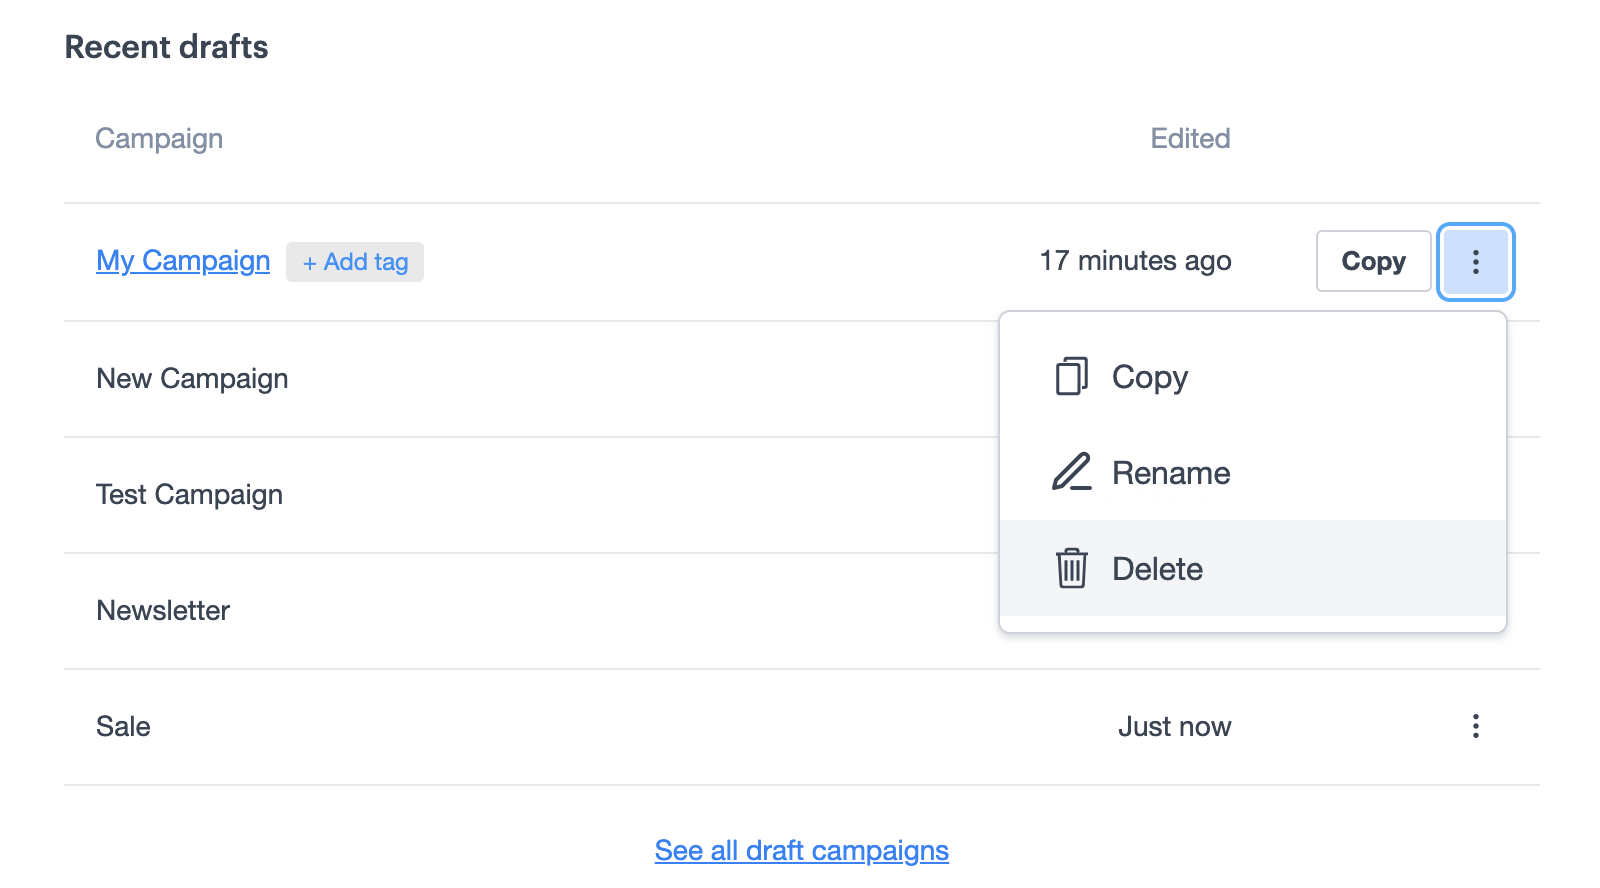
- Click Campaigns, and then choose either Drafts or Sent campaigns from the left menu.
- Select the three-dot icon for the campaign you want to delete, then choose Delete from the menu that appears.
If you or another person accidentally delete a campaign, it can be restored from the Deleted section for 30 days after deletion.
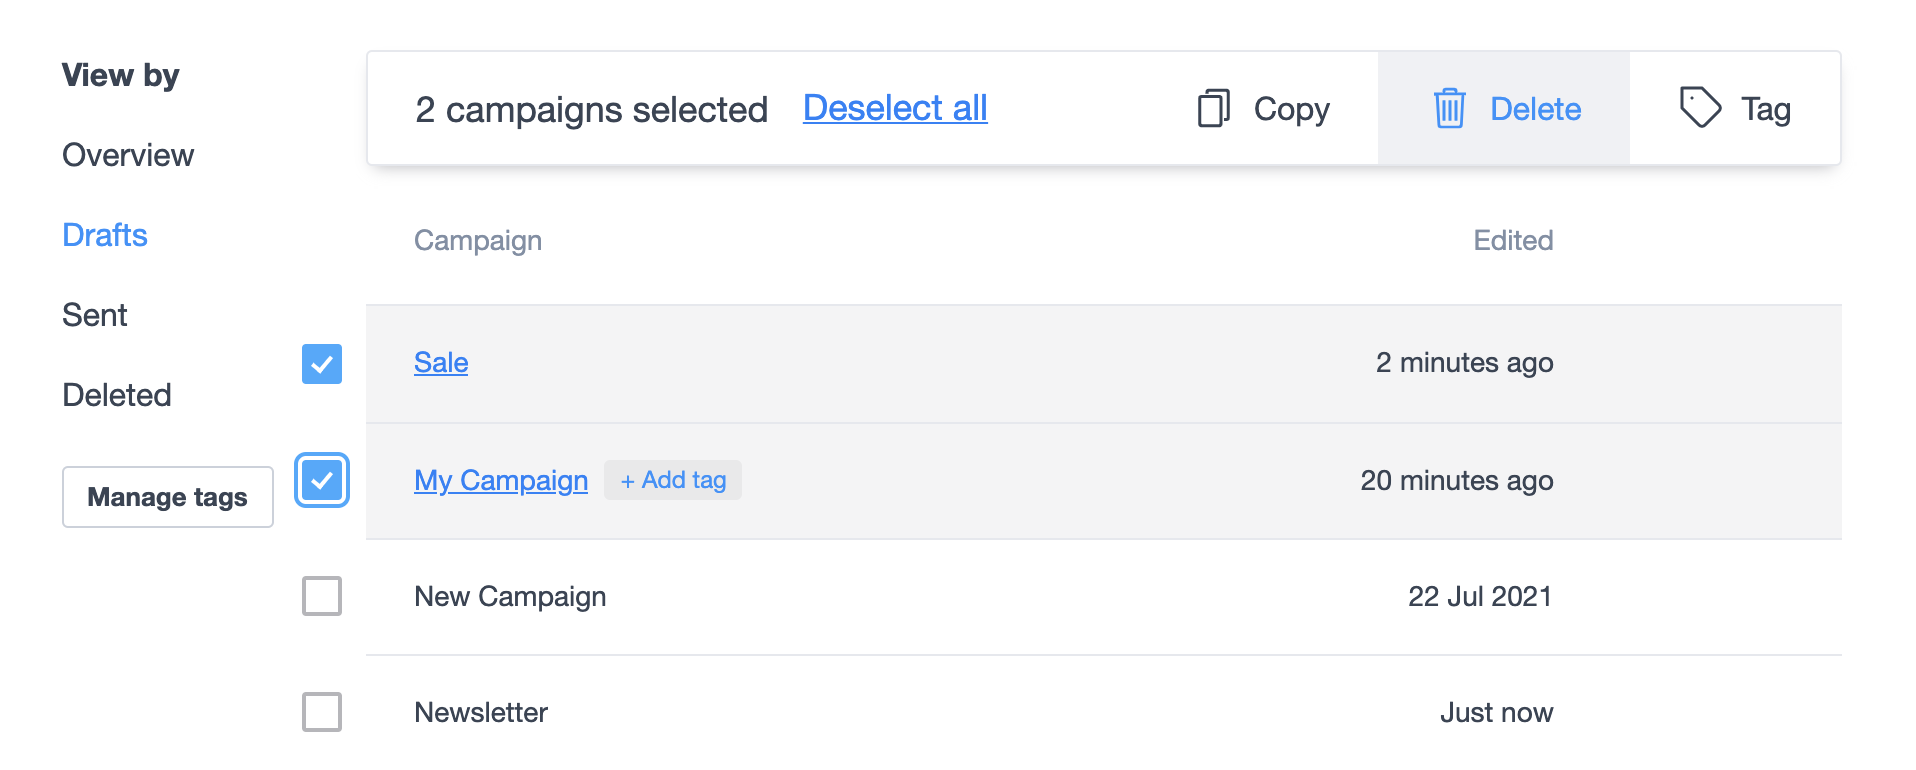
Multiple campaigns can also be deleted simultaneously:
- For each campaign you wish to delete, select the checkbox which appears as you hover over it. You can also use shift+click to select a range of campaigns.
- Choose Delete from the action menu which appears at the top of the table.
- Click "Yes, delete" in the confirmation box.
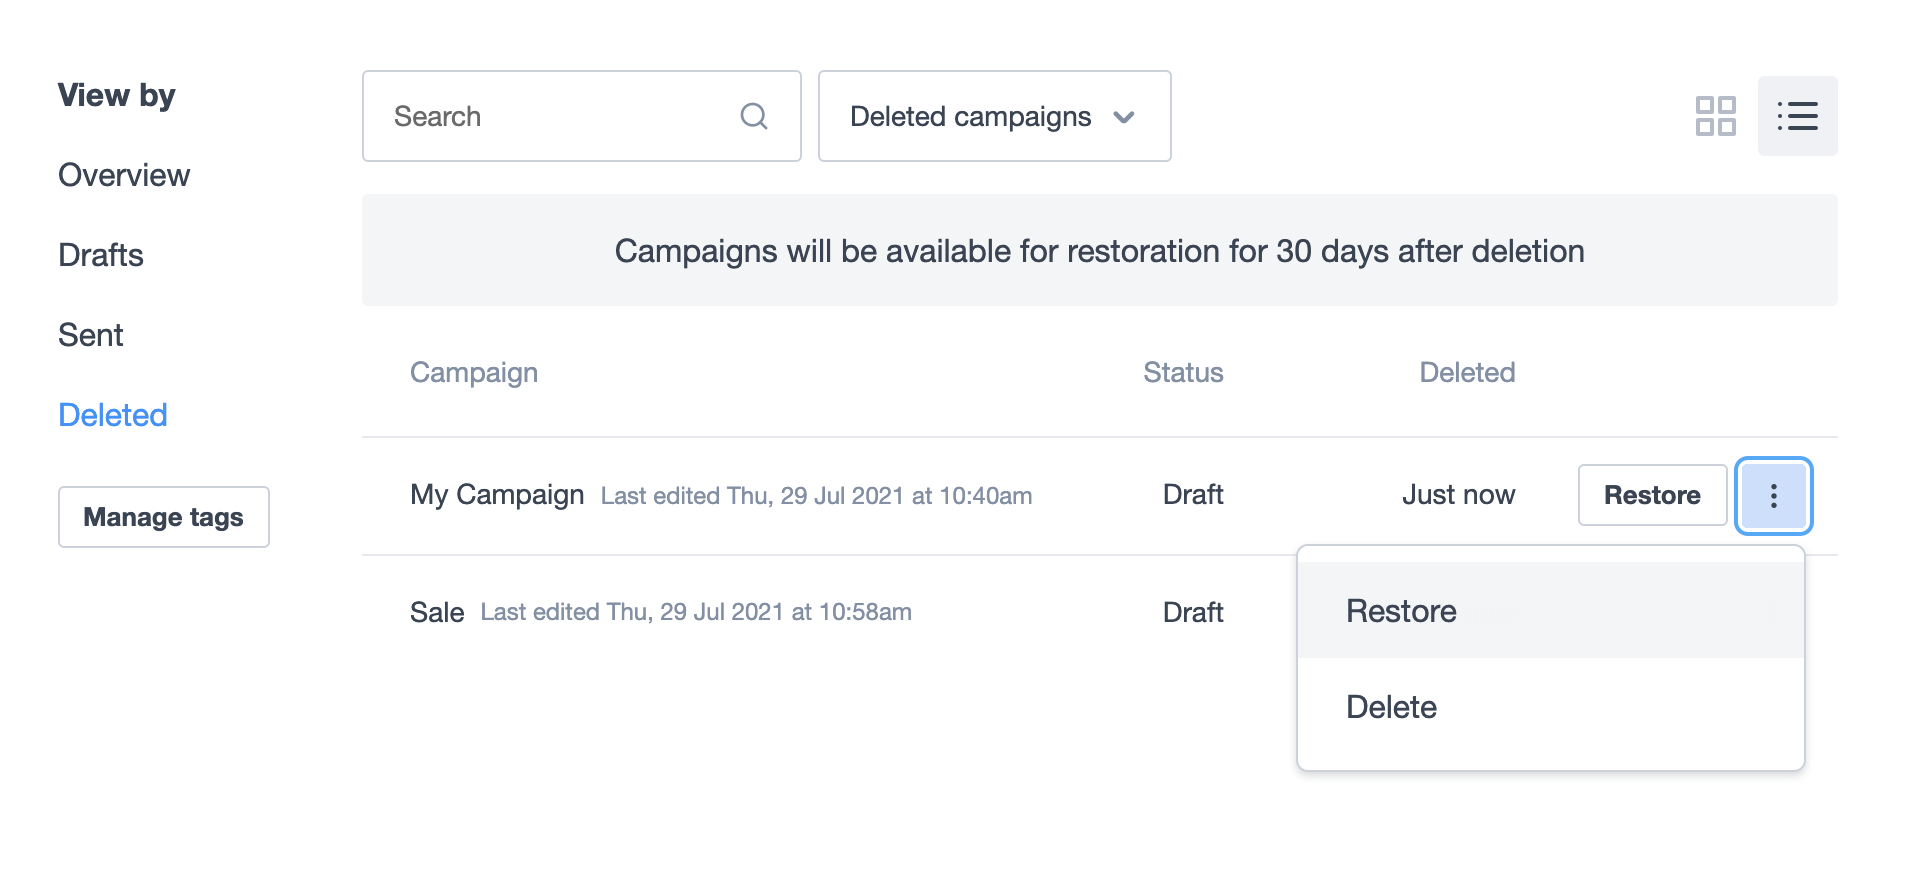
Restore a deleted campaign
On deletion, campaigns are moved temporarily to the Deleted area, and will be available there for 30 days before being automatically removed.
To restore a campaign to its previous status:
- Go to Campaigns, and click Deleted.
- Locate the campaign you're looking for.
- Choose Restore from the three-dot overflow menu.
- The campaign will be restored to its previous state (Draft or Sent), and you can access it directly by clicking on the link in the resulting notification.
Alternatively, you can confirm the deletion from the same menu, and the campaign will be removed from view immediately.