Dynamic content allows you to send personalised campaigns to multiple subscriber segments, all in a single send. For example, you could code an email campaign so it shows different product offers to different people based on their interests.
Below, we'll provide examples of how custom fields are used with dynamic content tags to create rules for who sees what. Then we'll guide you through previewing your campaign and creating its plain text version.
Where dynamic content tags can be used
Dynamic content tags can be used in imported emails and plain text emails. They can also be used in the email builder in text boxes, button text, and images from a URL.
Dynamic content tags will not work in subject lines, or links in the email builder. To personalise these elements, use personalization instead.
You can hide or show sections on a per-subscriber basis without code using our email builder.
How to use dynamic content tags
There are five ways to show or hide content in an email campaign, with a set of tags for each scenario.
If provided
If a specified custom field contains any value, display some content.
[if:CustomField]Your content here[endif] To display content to subscribers who have no value in the specified custom field, use:
[if:CustomField][else]Your content here[endif] If you want to address your subscribers by their first name, but don't want to use a fallback when they don't have a value in their Name field, you can use: [if:firstname]Hi [firstname][else]Hi[endif],.
If equals
If a specified custom field equals a specific value, display some content.
[if:CustomField=x]Your content here[endif] If/else
If a specified custom field equals a specific value, display some content, otherwise display alternative content.
[if:CustomField=x]Your content here[else]Your alternative content here[endif] If/elseif/else
If a specified custom field equals a specific value, display content "A". If it doesn't contain that value, check another specified custom field for a specific value, and if found, display content "B". If there is no match in either scenario, display alternative content.
[if:CustomField=x]Your "A" content here[elseif:CustomField=y]Your "B" content here[else]Your alternative content here[endif] If member of
If a subscriber is in any of the given lists or segments, display some content. You can put multiple list and segment names in this condition, separated by commas. They will be interpreted as OR statements.
[ifmemberof:"List One","List Two|Segment"]Your content here[endif] Preview your email
When you preview a campaign containing dynamic content, you can toggle through the different content options you've coded, as shown in the image below:

The way to preview dynamic content is different depending on whether you are working on a campaign or another kind of email such as a journey.
Campaigns
You can preview dynamic campaign content from the Preview email window by selecting Targeted content from the dropdown menu.
Custom coded HTML
Immediately after you import a custom coded journey email, you will see the option to Preview it.

You can preview the email at a later time clicking Preview from the journey builder or preview in the "Content" section of the "Create Smart Email" page.
If you need to change anything you can use the in-app editor, or re-import your edited HTML.
Email builder
To preview dynamic content used in the email builder, preview the email from the journey builder.
Imported dynamic content in plain text emails
On the campaign checklist, click Manage plain text version to modify the plain text that will be sent alongside the HTML email.
On the next screen, click Automated (for campaigns) or import it from your HTML to generate a starting point for the plain text version. If your dynamic content tags surround text only and not HTML code, your content will be imported exactly as you marked it up.
Here's what a text only portion of the campaign in our earlier example looks like:
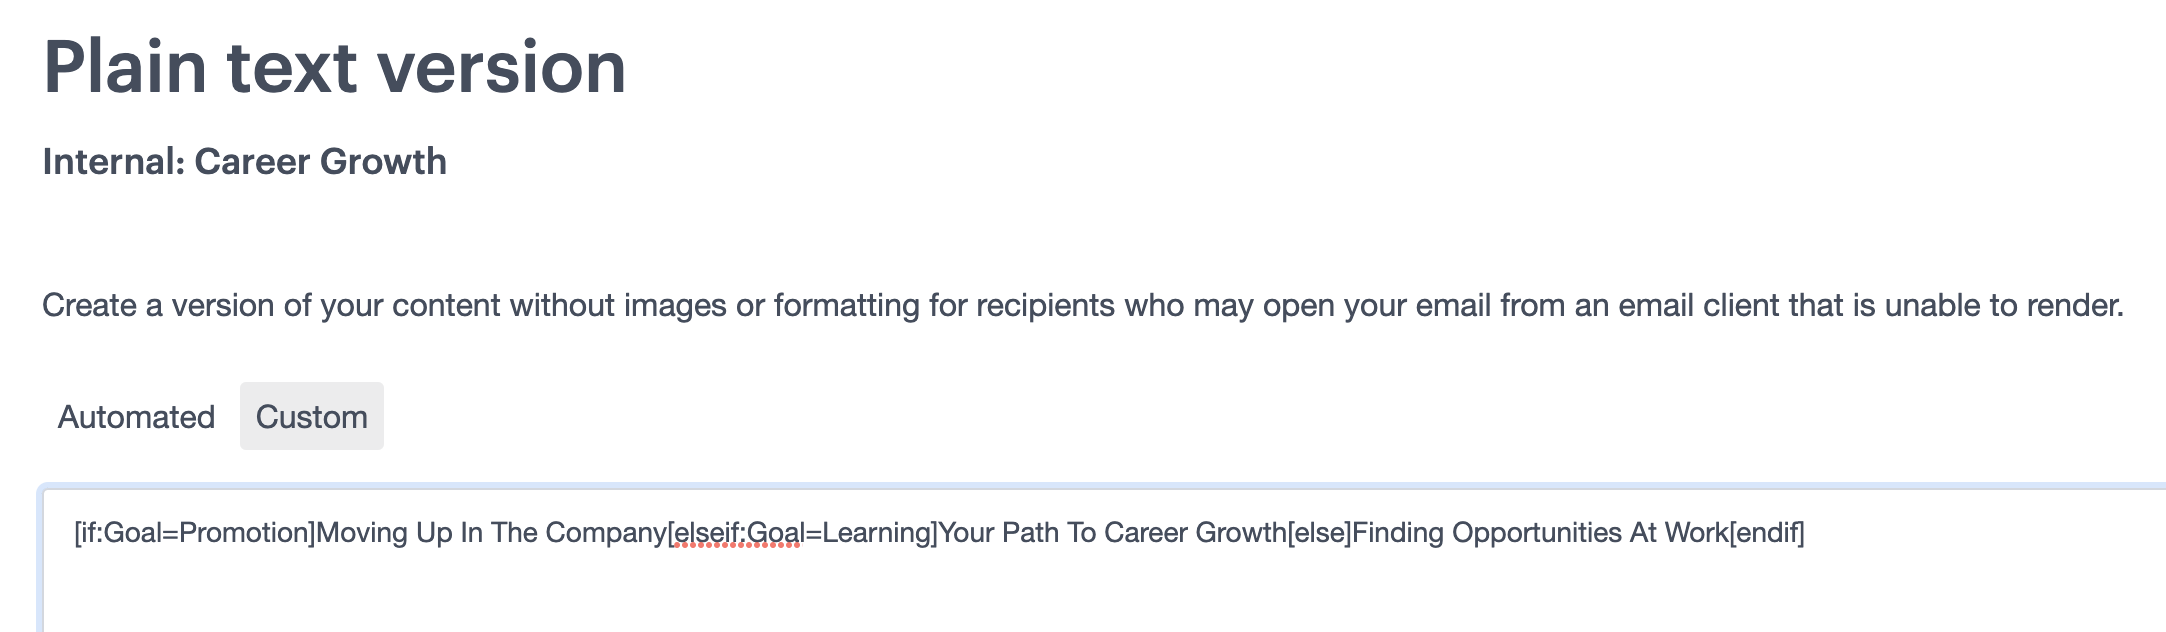
Because HTML elements aren't supported in plain text emails, dynamic content tags containing HTML won't be imported.
You may be able to edit the imported plain text version so it makes sense, but in some cases it's easier to write your plain text version from scratch, either by using different rules, or not using dynamic tags at all.
When your text-only version is ready, preview it by opening the Preview email window and selecting Targeted Content and Plain text from the dropdown menus.
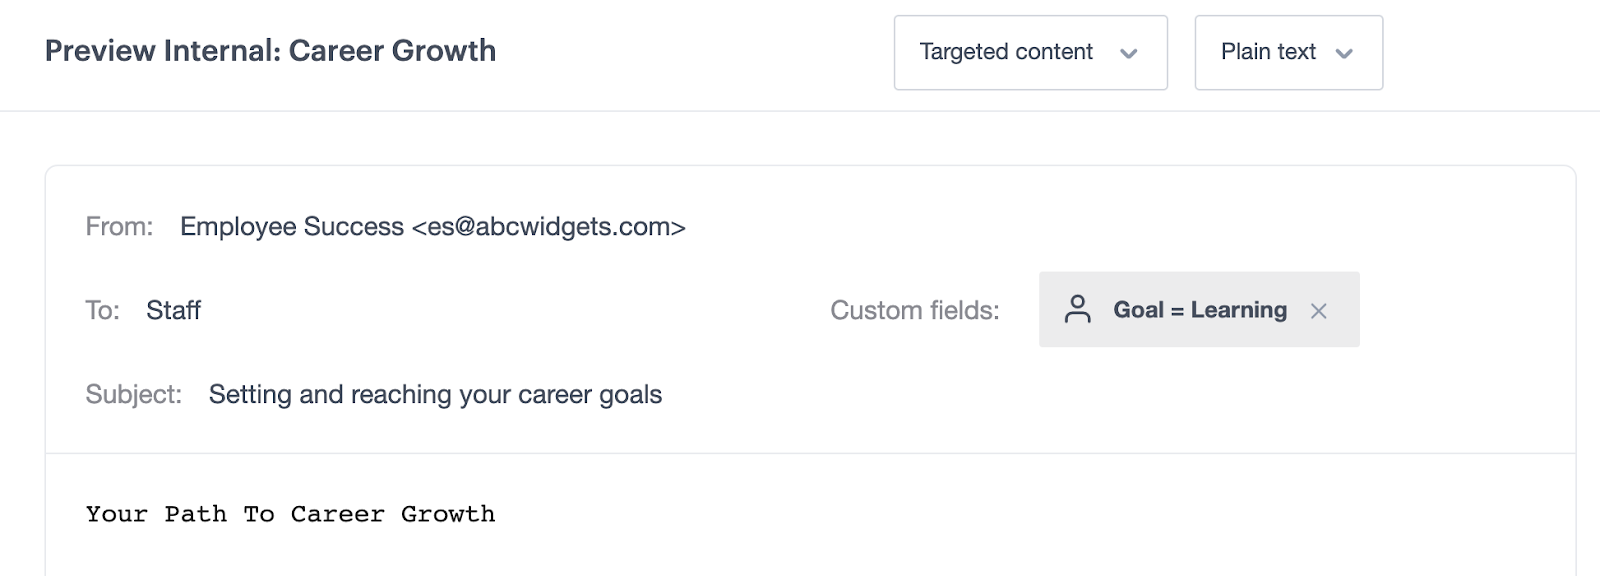
Use the Custom fields dropdown menu to check each version to make sure it looks like it should for the intended recipients.
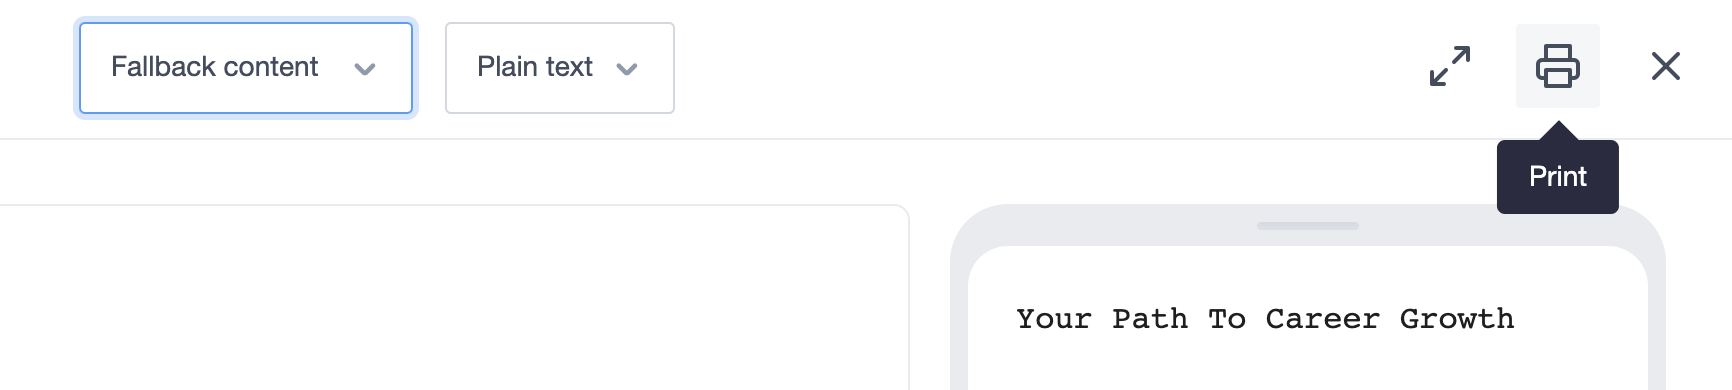
Finally, switch to Fallback content then click the printer icon to disregard dynamic content tags and view all of the content in your email.
When you are happy that all versions of your campaign are displaying as expected, continue through to scheduling your delivery or sending a test.
Test your dynamic content
While you are getting started with dynamic content we recommend sending multiple tests, to help you understand what your different recipients will see.