Journeysare built as a series of steps that are processed, one after the other, when triggered by a subscriber-related event.
There are five types of steps you can use to build a journey:email,delay,wait until,conditionandcustom field.
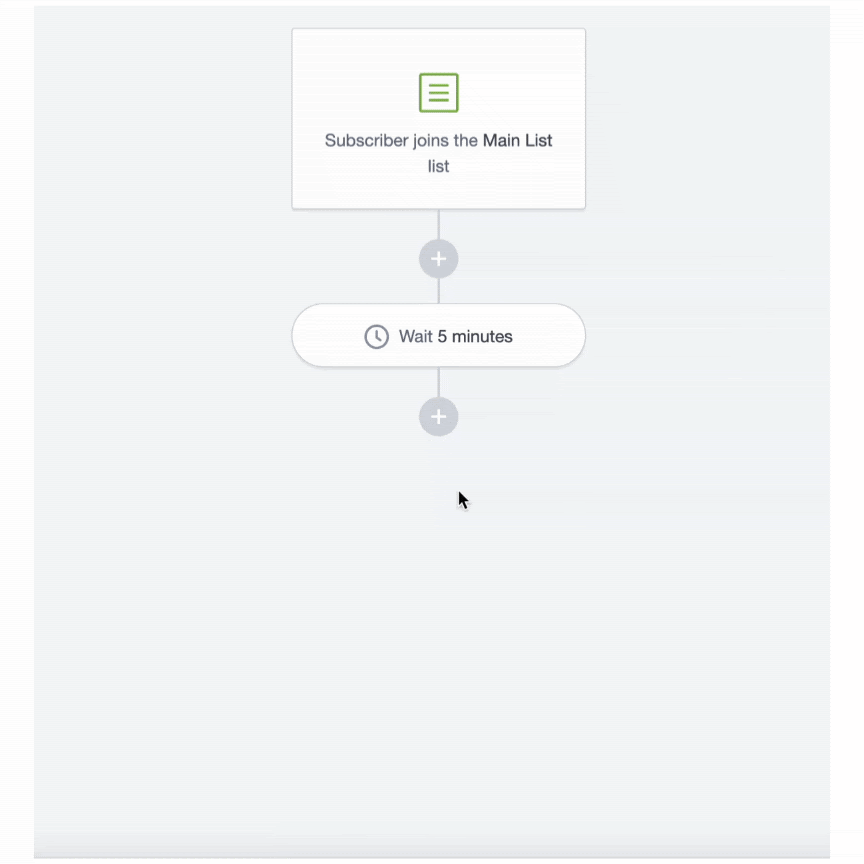
Insert a step by clicking wherever there is a+button in thejourney designer. You can adjust a step's settings by clicking on it, then changing them in the left sidebar.
The maximum number of steps in a journey is 250.
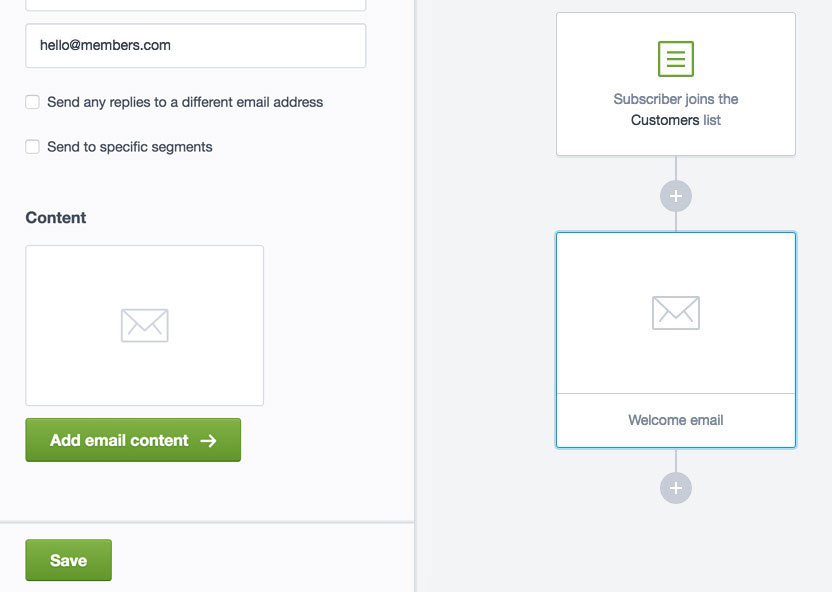
Email steps
Email steps are where you define the content of the emails you will send in the journey. When you add an email step, complete the information in the settings panel (the step name, subject line, sender details and so on) then clickSave. After that, clickAdd email contentto create the email.
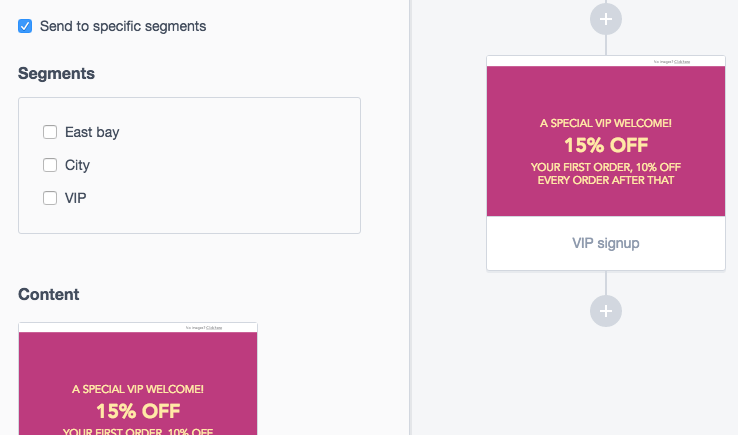
Send to specific segments
For each email added to the journey, you can choose to send it to everyone on the subscriber list, or only people who are members of certainsegments, if you already have segments set up. To do so, selectSend to specific segmentsin the settings panel:
Multiple segment selection
If you select more than one segment, it means the email will be sent to people who are in segment A,orsegment B,orsegment C.
If your intention is to email the subscribers who belong to all the selected segments, you will first need to create a segment that combines the rules of segments A, B and C, then select that.
Delay steps
Delays are "wait" steps, with the time set in minutes, hours, days, weeks, or months. Steps in a journey are processed immediately, one after the other, unless you put a "wait" step between them. Below are three examples of how to use delay steps.
For delay steps, a month is considered 30 days.
Space out a series of journey emails
For journeys that contain more than one email, add delay steps to the sequence so customers are not overwhelmed with messages. For example, you could send an email each day for a week by inserting a one-day delay between eachemail step.
Give recipients time to respond
Delays are important for certain types ofcondition-based journeys. For example, a condition step based on campaign activity requires a delay to give subscribers time to receive and open the email.
Use delays to send after a specific date
When you createdate-triggered journeysyou only get the option, in the settings panel, to send on or before the date in the subscriber's custom field:
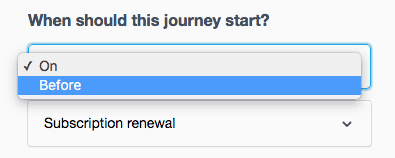
To create a date-triggered journey where the first email is sentafterthe trigger date, chooseOnfrom the "When should this journey start?" dropdown menu. ClickSavein the settings panel, then click the+button in the journey designer to add a delay step for however long after the date you want the email to be sent.
To change the length of time for a delay step, click the "Wait" step in the journey designer to open the settings panel:
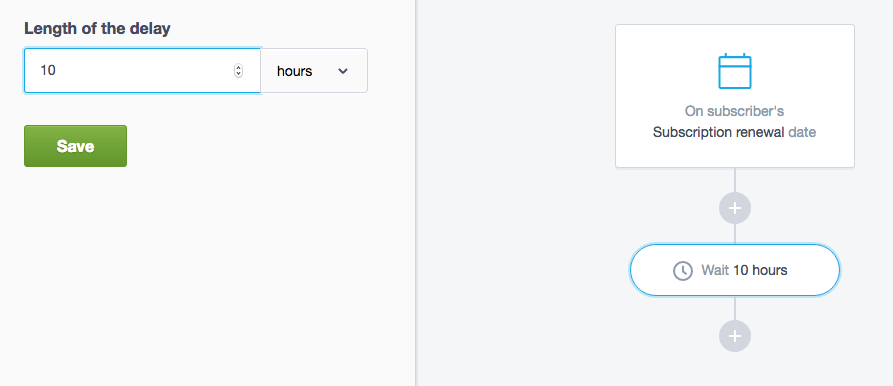
The total length of time a journey can run, including delays, is 729 days. The exception is the "an anniversary of a date" journey, which can only run for a year.
Wait until steps
Wait until steps are "wait" steps. Steps in a journey are processed immediately, one after the other, unless you put a "wait" step between them. Subscribers entering this step will not proceed until one of the specified times and days of the week is reached, then they will proceed to the next step in the journey.
Wait until steps are processed in your account's time zone, shown in the left sidebar.
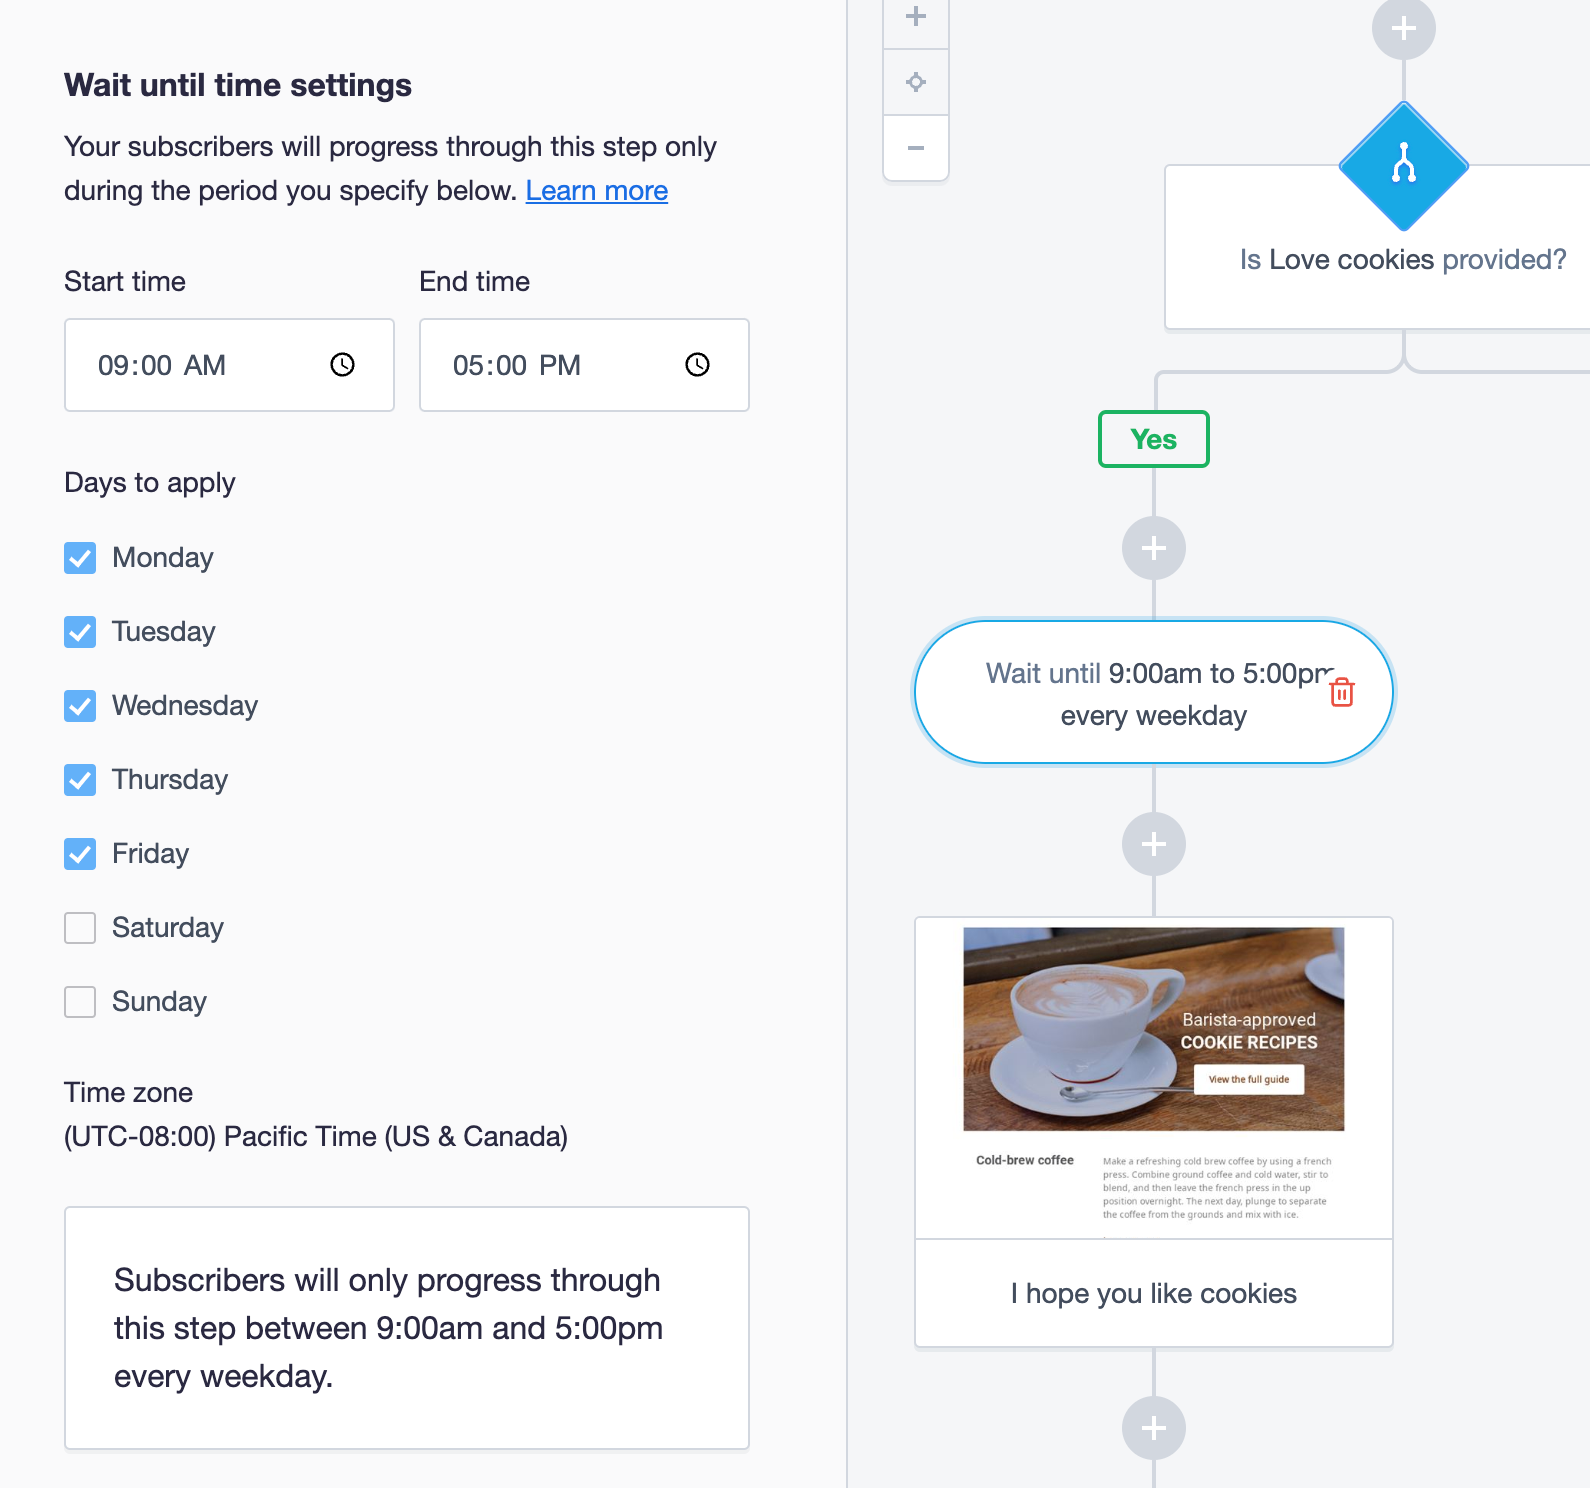
Wait until settings
Wait until allows you to specify a start time, end time, and days of the week that subscribers can progress through this step. Subscribers arriving outside those times will wait at the step until the specified period before proceeding to the next step in the journey.
Example: Email subscribers during business hours
For example, if you want to email your subscribers during business hours only, you would add a wait until step before your journey's email step. Set the start time to 9:00am and the end time to 5:00pm, select weekdays only, and clickSave.
In this situation, if a subscriber enters the wait until step on Sunday at 6:00am in your time zone, they will wait at the step until Monday at 9:00am. On Monday at 9:00am, the subscriber will then progress to the next step in the journey and be sent the email.
If a subscriber enters the wait until step within the specified start time, end time, and days, they will immediately proceed to the next step in the journey.
Condition steps
Conditions are steps that split a journey into two paths, based on a rule. For example, you might want to give VIP customers a larger discount when they sign up:
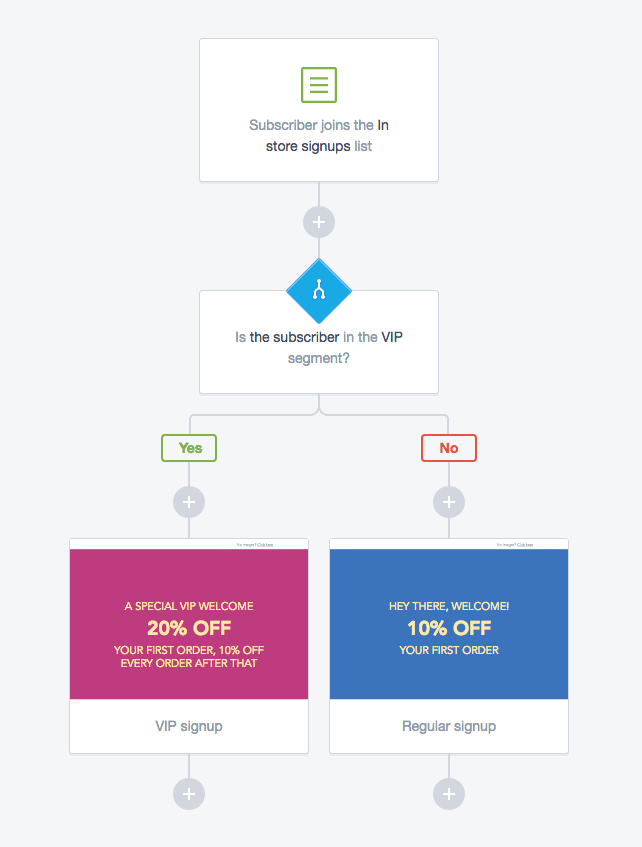
Subscribers who match the rule will follow the "Yes" path. Subscribers who don't will follow the "No" path.
After you have created separate paths with a condition, those paths cannot join back up later. For example, if you branch off to send a series of unique emails to VIP and standard customers, you can't merge the VIP and standard paths afterwards to send them the same email via a single step. That content will need to be duplicated in both paths.
Instead of using a condition to separate content for VIP customers, you could use ourdynamic contentfeature to include the VIP messaging within a section.
Condition rules
Condition steps are built on rules, similar tosegments. You can add up to five rules for any condition and specify whether any or all of the rules need to be true for the condition to be met.
After adding a condition step, start by choosing an attribute from the "Rule" section in the left sidebar:
Conditions based on campaign and journey activity don't wait for a response from the subscriber before being processed. Because of this, it's important to insert adelay stepbefore the condition, so subscribers have time to open or click the selected email.
Subscribers who have not given theirpermission to be trackedwill always be sent down the "No" path when campaign or journey activity are selected.
Subscriber details
Choose from the subscriber's name, email address or date subscribed to create a rule. For example, date subscribed is after YYYY-MM-DD.
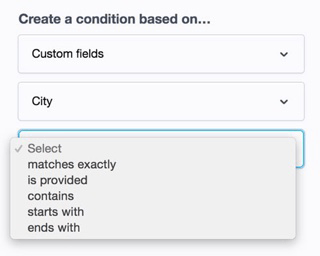
Custom fields
Create a condition based on data stored in your list'scustom fields. For example, your subscribers' city or state:
Segment membership
A condition based onsegmentmembership checks if a subscriber is currently a member of a specific segment, to determine which email they are sent.
Campaign activity
Choose this option to create a condition based on subscriber activity in a previously sentcampaign. You'll be prompted to select a campaign and the type of campaign activity that fits your purpose. For example, if the campaign:
- Was opened
- Had any link clicked
- Had a specific link clicked
- Was opened with no links clicked
- Was opened and did not have a specific link clicked
The previously sent campaign has to have been sent to the same list the journey is being sent to. You also need to have sent the campaignbeforedefining the journey condition. You can't select a draft campaign, or a campaign that is scheduled to send later.
Journey activity
This option allows you to create a condition based on journey engagement. It can be set up to track email activity in the journey you're currently working on, or an email in a different journey (so long as it's being sent to the same list).
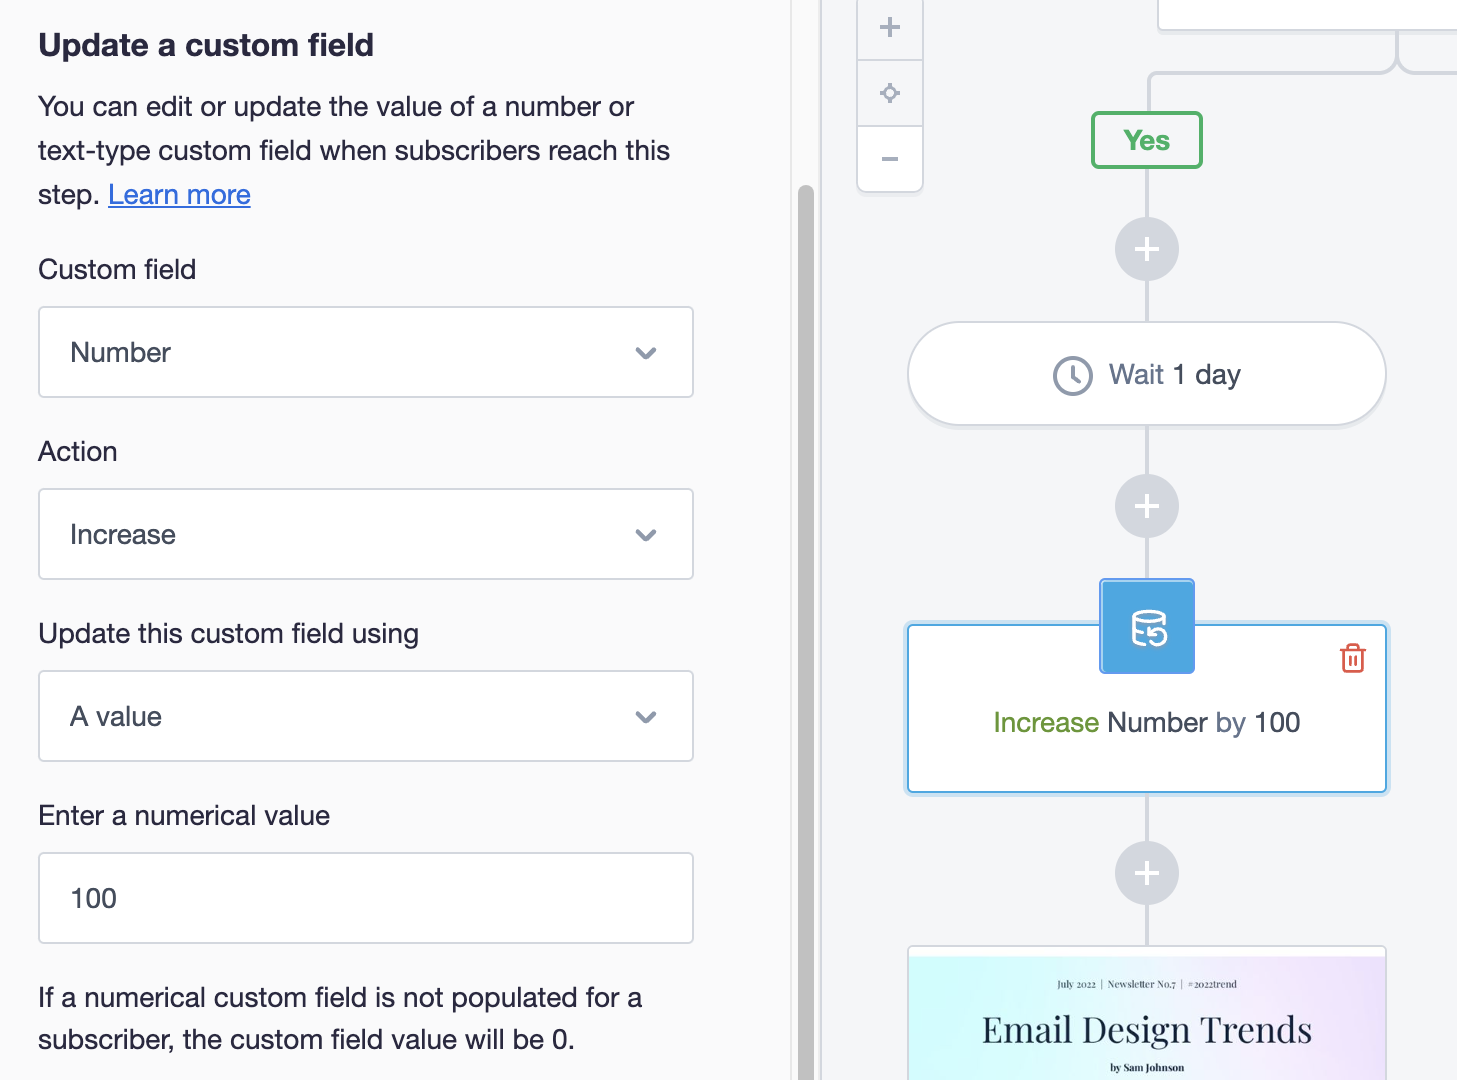
Custom field steps
Custom field steps allow you to update the data stored in your subscribers? custom fields. For example, you might want to increase a custom field by 1 each time the subscriber enters an anniversary journey, counting how many years they have been subscribed. When you add a custom field step, complete the configuration in the left sidebar (the custom field, action, and value) then clickSave.
Currently, only number and text-type custom fields can be updated by the custom field step.
The Action field provides the following options:
- Set — This sets the value of the custom field to the value based on the configuration you set.
- Increase — This increases the value of the custom field by an amount based on the configuration you set.
- Decrease — This decreases the value of the custom field by an amount based on the configuration you set.
If the subscriber has an empty value in the custom field that is being increase or decrease, we will treat the custom field as if it has a zero value.
You can update the custom field using a value you set, from another custom field, or with trigger event data.
Update with another custom field
If you choose to update a custom field using another custom field, they must be of the same type. For example, text custom fields can only be used to set text custom fields, and number custom fields can only be used to increase, decrease, or set number custom fields. You cannot set a text custom field using a number custom field.
When using another custom field to update, if a subscriber has an empty value in that field, we will not update. For example, if you want to set the subscriber's custom field VIP using the value of the Loyalty Tier custom field. If the subscriber does not have a value in Loyalty Tier, their VIP custom field will remain unchanged.