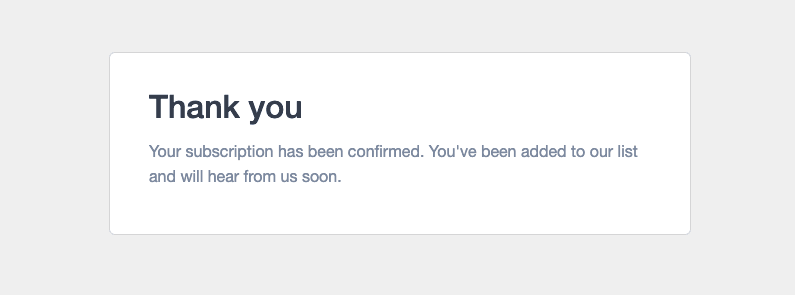
When someone subscribes or unsubscribes from a list they'll see a generic confirmation page. The signup confirmation page for a single opt-in list looks like this:
For confirmed opt-in lists, there are two confirmation pages. The first one says: "You've just been sent an email to confirm your email address. Please click on the link in the email to confirm your subscription."
The second confirmation page, displayed after the recipient has verified their email address, is identical to the image above.
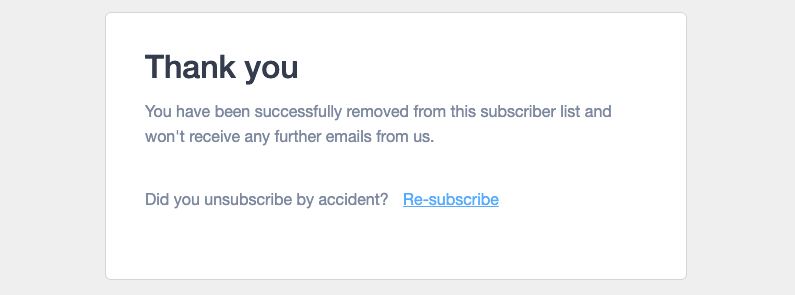
The unsubscribe confirmation page for both single and confirmed opt-in lists looks like this:
You cannot customise these default pages but, if you're using a HTML form, you can redirect people to your own, hosted confirmation pages.
If you use a hosted signup page, the subscription confirmation is built-in, meaning subscribers cannot be redirected to a custom landing page.
Set a custom confirmation page
To replace your list's subscription confirmation page with a custom page:
- Select Lists & subscribers, then click on the relevant list name.
- Click Settings in the left menu.
- Select the Subscription success page.
- Remove the default URL and replace it with your confirmation page URL:
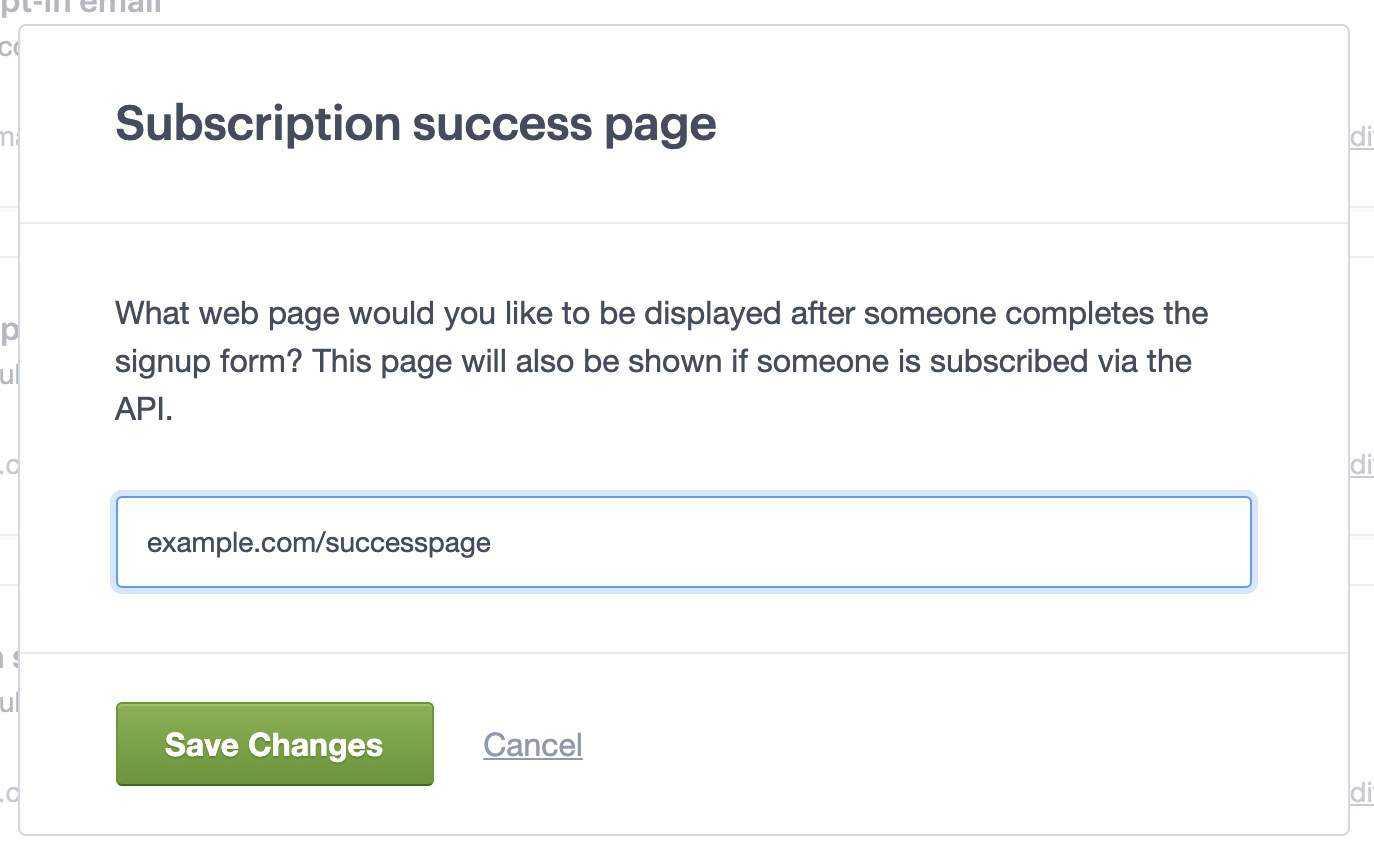
- Click Save changes.
From now on subscribers will be redirected to your custom confirmation page after submitting the subscribe form.
With confirmed opt-in lists you can personalise the verification email and add your own, custom welcome email.
- Select Lists & subscribers, and click on the relevant list name.
- Click Settings in the left menu.
- Click the Subscription confirmation setting. Select the Confirmed opt-in option.
- Click the Confirmed opt-in email setting and customise the verification email content.
Set a custom unsubscribe page
Unsubscribe success pages can be replaced with a custom page no matter what type of subscribe form you're using.
To redirect people to your own unsubscribe page:
- Open Lists & subscribers, then click on the relevant list name.
- Click Settings in the left menu. Select the Unsubscribe page and survey option
- Select the option to Redirect unsubscribers to your own unsubscribe success page and add your custom URL.
- Click Save changes.
If your site has an SSL certificate, you can include https:// on the custom page URL.