Signup pages are standalone web pages with a unique URL that you can share online or add to an email signature to attract new subscribers. You don't need a server to host a signup page, because we host it for you.
Create a signup page
To set up a signup page for one of your lists:
- Click Lists & subscribers, then click on the relevant list name.
- Click Signup forms in the left menu.
- Select We'll create a signup page for you from the options listed.
- Use the editing tools to customise your form and then click Save and generate link.
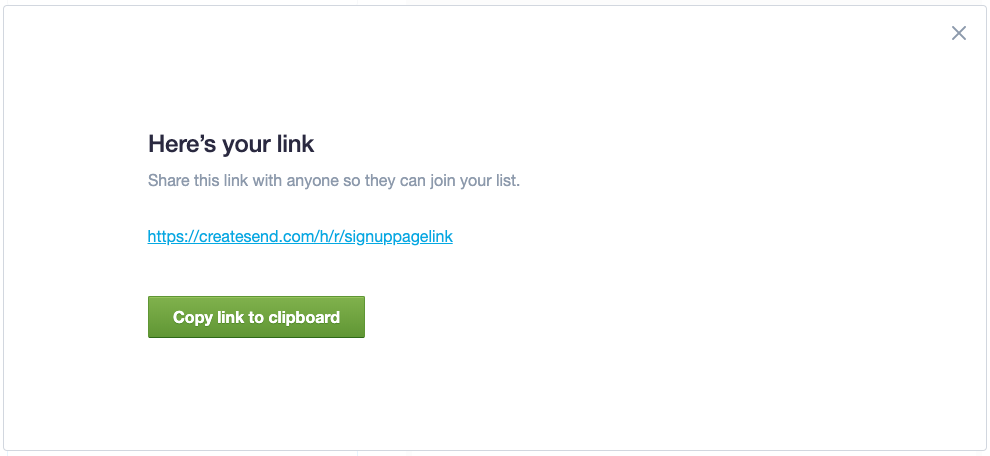
You can test how your form works in the preview, without leaving the page. Data entered in the demo form on that page will not be added to your subscriber list.
Click the link to open the live signup page in a new window. If you complete the form, the data will be added to your subscriber list.
Customise the page
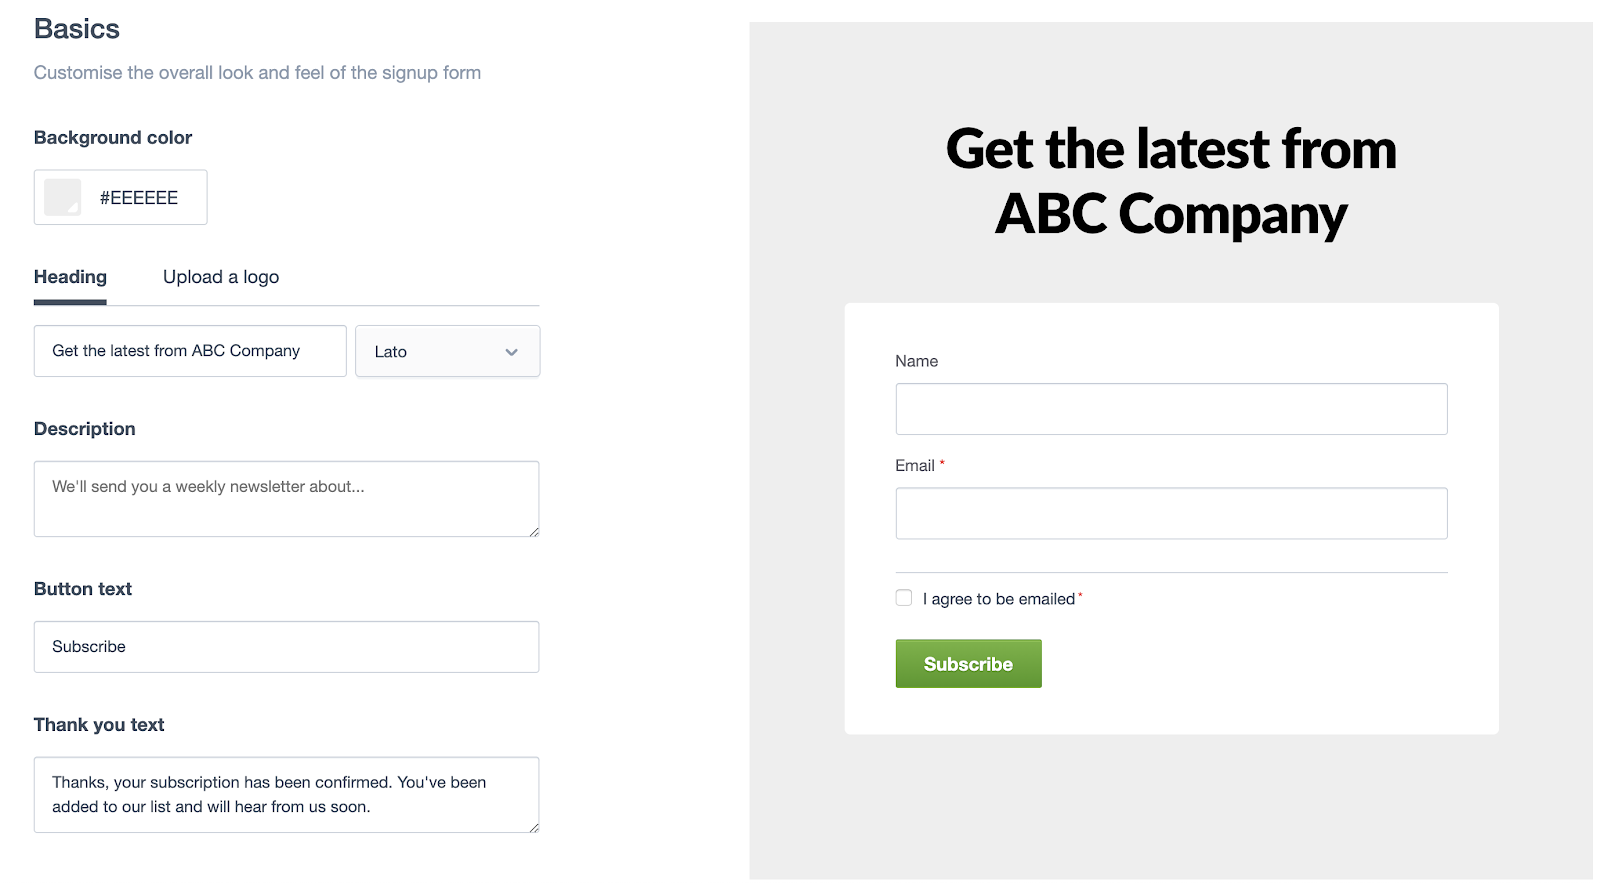
When you first load a signup page, you'll see customisation options on the left:
The sections below provide tips and advice for customisation.
Page title or image
Choose between a text title for the page, or upload an image instead:
- The maximum title length is 70 characters.
- The maximum width for an image is 566px, and maximum height is 120px.
If you stick with a text title, you can choose a different font from the menu below the title field. The text in the title field is also displayed on web browser tabs as the page title:

If you use an image instead, the title text is still used on web browser tabs. If you delete the title text, our default text will show instead: "Signup to our newsletter".
Custom fields
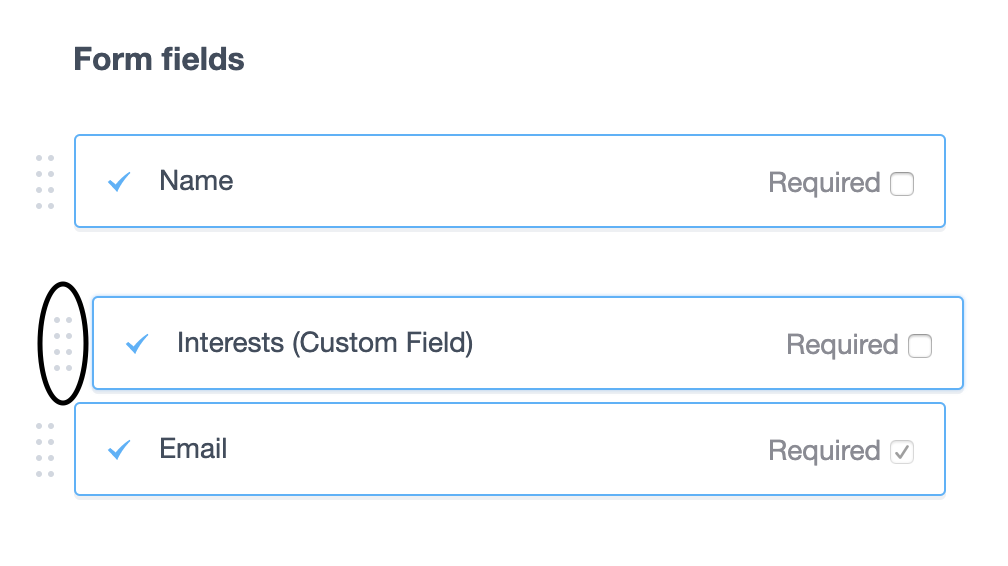
If your subscriber list has custom fields set up, they will be listed beneath the default fields for name and email.
Click on any fields you want to be included on the form, and click the Required checkbox if you want to make them mandatory. You can also change the display order of custom fields by clicking the drag handle on the left to move them up or down:
You can also include additional opt-in lists on a signup page. You can include other lists on the signup form by clicking on Select a list, allowing people to opt-in to multiple lists at the same time. You can select the additional lists you want to add to this form by using the checkboxes.
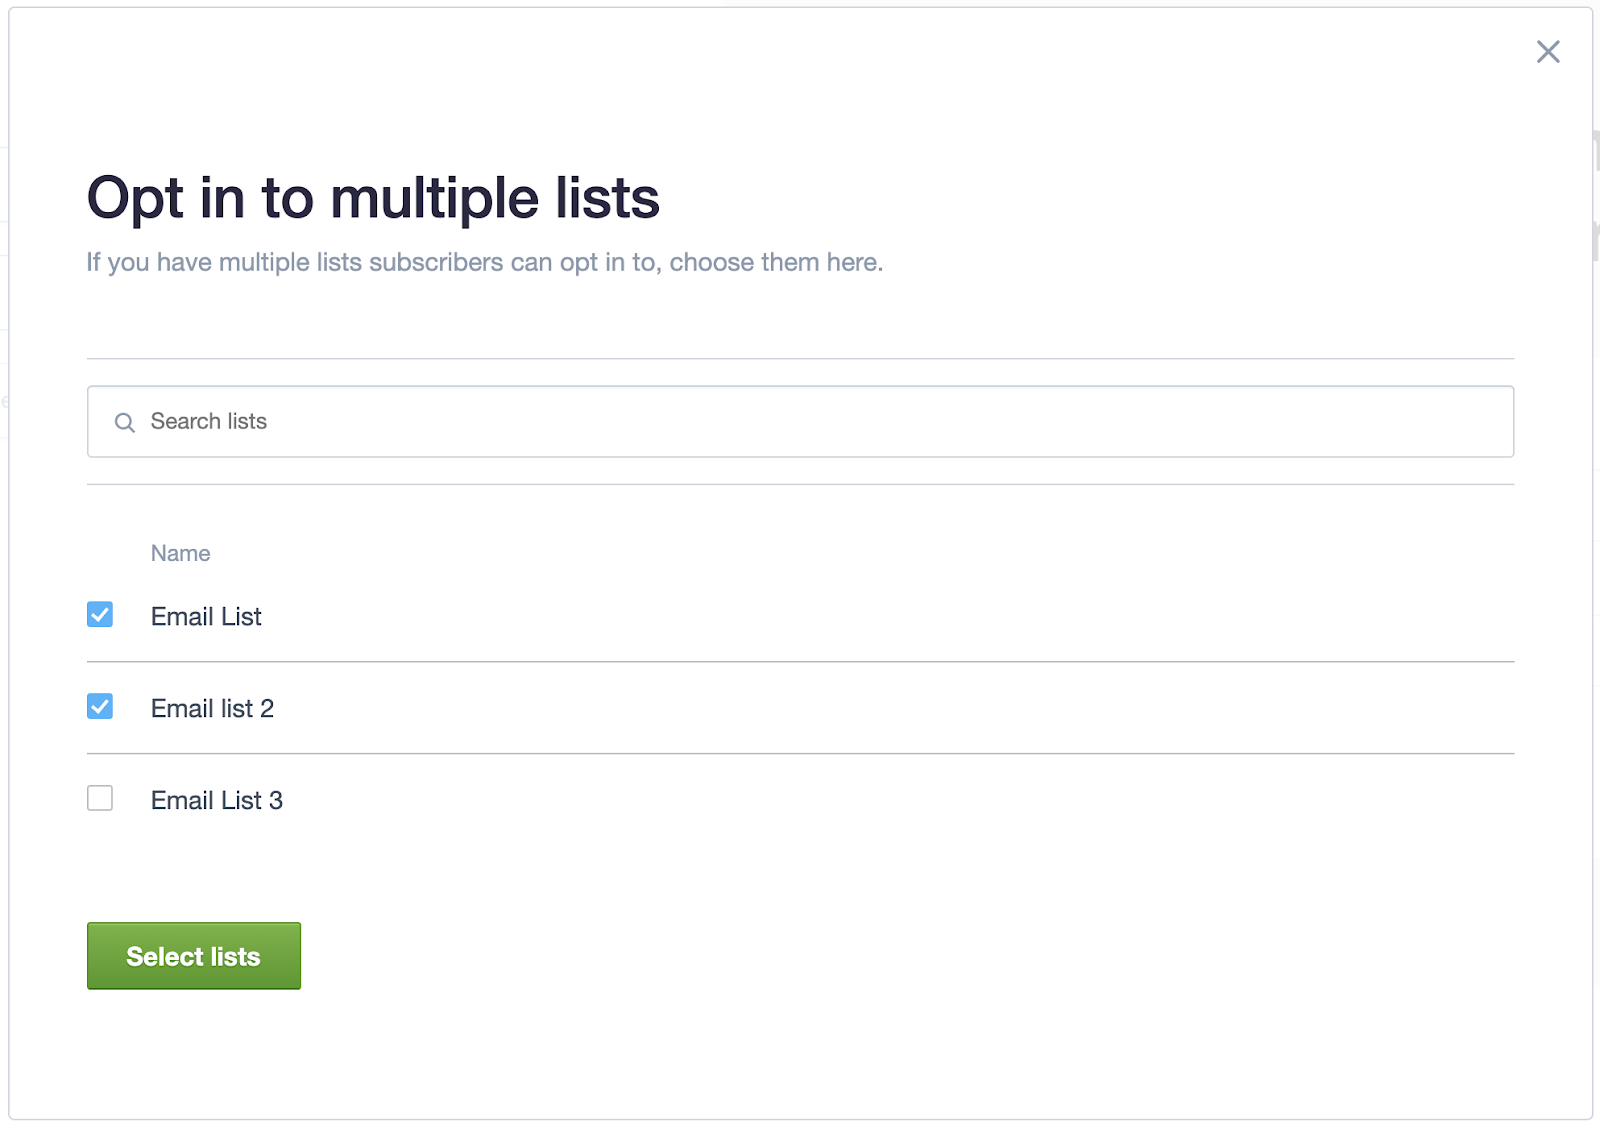
If custom fields are included on the form, and the additional lists have custom fields of the same name and type as the original list, the subscriber data submitted will be added to both the original and additional lists. Field names are not case sensitive.
To reduce confusion for subscribers when including multiple lists on the one signup form, make sure the selected lists are either all confirmed opt-in, or all single opt-in. If all the lists are confirmed opt-in, the subscriber will only receive a single confirmation email that will add them to all lists.
Language settings
Selecting a different language automatically changes the default field labels: name and email. It also changes the language of error messages that might be displayed when someone is filling in the form.
All other content must be manually changed to your language of choice:
- Custom field labels — If they are in English, they'll show up on your signup form in English. To edit them, navigate to your subscriber list page and click Custom fields in the right sidebar.
- Thank you text — The default copy will not be converted to your chosen language. Make sure you overwrite it in your chosen language.
- Verification email content — For confirmed opt-in lists only. The verification email, sent to people to confirm their subscription, is in English. To edit it, open your subscriber list, click Customise landing pages in the right sidebar, then scroll to "The subscription confirmation email" at the bottom of the page.
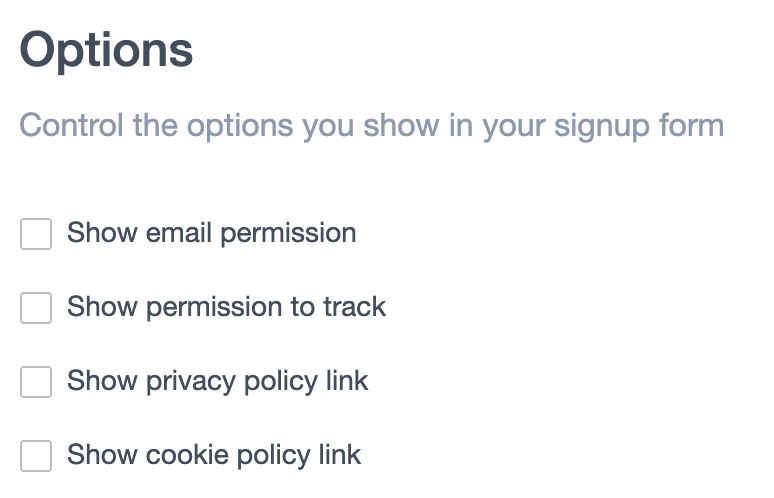
Subscriber permission and company policies
You can optionally show email and tracking permission checkboxes on signup pages, and provide labels for them. A potential subscriber can then explicitly choose whether or not they will accept email, or allow tracking of their email opens and clicks.
To turn on the permission checkboxes, see the "Options" section when customizing your signup page. You can also link to your privacy and cookie policies, if you have them.
Thank you message
The text field labelled "Thank you text " is the success message displayed after someone has finished signing up. You can edit it to suit, just be mindful that the default message corresponds to the opt-in setting for your list, as explained below.
Default confirmation message:
For single opt-in lists the default success message is:
"Thanks, your subscription has been confirmed. You've been added to our list and will hear from us soon."
For confirmed opt-in lists the default success message is:
"Great. We've just sent you an email. Click on the link in there to confirm your subscription."
If you rewrite the message for a confirmed opt-in list, remind people to check their inbox for a confirmation email. Those who don't verify their email address will remain unconfirmed on your list.
Mobile number and SMS consent
If you have enabled SMS campaigns, you can display the Mobile number field and an SMS marketing consent checkbox on your form. See Collecting mobile numbers to grow your SMS subscribers.